Pagina's

vrijdag 27 mei 2011

home-made limoncello (GF - DF) and lemon syrup (GF - DF)


We had some rain tonight and my small garden is very happy with the extra water from the sky. Plants in pots need a lot of care and attention, happily I like that too. Look at my tiny lettuces:


and my sorrel:


and my patisson you can see growing:


With the sun shining and the clouds racing through the sky it’s time to finish the limoncello.
I had a small taste and for a first time: yes, it’s nice. In broad daylight it will be different than after a nice meal, because in the end it is a digestive.

Italians love their guts and are sensitive to a good digestion.
We celiacs have the same concern: our guts and a healthy digestion.

The limoncello is easy to make, it just takes time to rest and ripe.
So begin now and enjoy this summer.

Limoncello (1,5 l)

4 organic lemons
1 liter vodka
140 g very fine sugar
500 ml water
Juice of 1 organic lemon

Soak the lemons for 30 minutes in water.
Dry them and cut off the yellow peel. No white parts, that will make the limoncello bitter.
Put the peels in a big 2 liter glass pot and pout in a half liter of vodka.
Let it be for 4-5 days.

Make a sugar syrup from the sugar and water. Let it cool and add to the lemon peel- vodka mixture, together with the rest of the vodka and the juice of a lemon.
Put the liqueur in a dark place for another 4-5 days.

Pour the liquid through a fine cloth, cheesecloth for example, fill 2 nice sterilized bottles with the limoncello and let it rest for another week before you can enjoy it.
It will keep for at least 1 year! Cheers!!

With the 4 peeled lemons I made a very nice lemon syrup (1/2 liter)

You need equal amounts of juice, water and sugar (I think honey will do fine too, when you don't want to use sugar). 4 big lemons give about 250 ml of juice.
Make a sugar syrup from the water and sugar, let it cool completely and stir in the lemon juice.
It's ready to serve with the amount of water you like; pour in a sterilized bottle and it will keep for at least 2 weeks in the fridge!


Limoncello (1,5 l)

4 biologische citroenen
1 liter wodka
140 g zeer fijne suiker
500 ml water
Sap van 1 biologische citroen

Week de citroenen 30 minuten in een bak water.
Droog ze af en snijd de gele schil van alle citroenen. Geen witte restjes, dat maakt de limoncello bitter.
Doe de schil samen met een halve liter wodka in een grote 2 liter glazen pot. Laat het 4-5 dagen staan

Maak een suikerstroop van de suiker en het water e laat het afkoelen.
Voeg de siroop toe aan het wodka – citroenschilmengsel en voeg de andere helft van de wodka en het sap van 1 citroen toe. Zet de liqueur weer 4-5 dagen op een donkere plek weg.
Zeef dan de vloeistof door een fijne doek, bijvoorbeeld kaasdoek en vul 2 flessen met de limoncello.
Laat het nog minimaal 1 week staan voor je het serveert.
Het blijft zeker 1 jaar goed! Proost!!

Van de 4 overgebleven geschilde citroenen heb ik een heerlijke citroensiroop (1/2 liter) gemaakt.

Je hebt gelijke delen citroensap, water en suiker nodig (ik denk dat honing ook erg lekker is als je geen suiker wilt gebruiken). 4 grote citroenen geven ongeveer 250 ml sap.

Maak een suikerstroop van het water en de suiker en laat helemaal afkoelen. Voeg dan het citroensap toe, meng goed en het is klaar om te gebruiken. Verdun met de hoeveelheid water die je lekker vindt.
Giet in een gesteriliseerde fles en het blijft zeker 2 weken goed in de koelkast.

maandag 23 mei 2011

Lemon ricotta mousse – citroen-ricotta mousse(GF-SF)


I'm in the mood for mousse, I guess, after the yoghurt mousse I made this one with ricotta and yes, it's gorgeous too.
On my list is an easy marshmallow chocolate mousse.

But first I'm using lemons, big juicy organic lemons from the tuesday market in town. There is a big glass jar filled with lemon skins and ...vodka in my cupboard: Limoncello-to-be. From the juices I made a lovely lemon syrup, great for warm days. Recipes follow later on.

When you make the lemon mousse you can fill a lot of tiny glasses so you can have a small treat whenever you want too.


Lemon ricotta mousse (4 p)

250 ml ricotta
3 tbsp honey
1 organic lemon
½ tsp agar-agar powder
125 ml cream

Mix the ricotta with the honey.

Zest and juice the lemon. Warm 3 tablespoons of the juice, don’t let it come to cook. Stir in the agar-agar powder well and stir into the ricotta-honey mixture together with the zest.

Whip the cream and slowly fold it with a spatula into the ricotta mixture as well.

Tip: at this point you can add grated or chopped chocolate to get a stracciatella effect, also very, very delicious.

Fill 4 big or more small glasses and put them in the fridge for at least 2 hours.


Citroen-ricotta mousse (4 p)

250 ml ricotta
3 el honing
1 biologische citroen
½ tl agar-agar poeder
125 ml slagroom

Meng de ricotta met de honing.

Rasp de schil en pers de citroen uit. Verwarm 3 eetlepels citroensap, laat het niet aan de kook komen. Los het agar-agar poeder er in op en roer in het ricottamengsel samen met de citroenrasp.

Klop de slagroom stijf en spatel het voorzichtig in het ricottamengsel.

Tip: op dit moment kun je er wat chocoladerasp of gehakte chocola aan toevoegen voor een stracciatella effect, ook erg lekker!

Vul 4 grote of meerdere kleine glazen en zet ze minimaal 2 uur in de koelkast om op te stijven.

woensdag 18 mei 2011

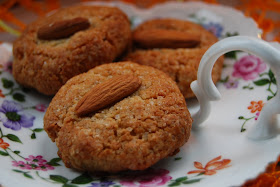
Orange scented amaretti – sinaasappelbloesem amaretti(GF- DF)


I was craving for a cookie today, I definitely needed something sweet.
Something quick, something tasty.
A cookie that lasts when I take it out, no crumbly thing but crunchy and firm.
I made these wonderful gluten-free amaretti.
Just try it and convince yourself.

Orange scented amaretti (14 pcs)
printversion

100 g almond flour
100 g cane sugar
1 egg white
1 tbsp candied orange peel
1 tbsp orange blossom water
14 whole almonds

Pre-heat the oven on 200˚ C and cover a baking tray with some parchment paper.

Put the cane sugar in a small food processor and blend it till it’s less coarse, about 1 minute.
Add almond meal and orange peel and blend everything together for another 15 seconds.

In a big bowl whisk the egg white till it begins to form white foam, not totally till it peaks, let’s say about half way.

Stir in the dry ingredients and mix till a dough forms.

“Wash” your hands in orange blossom water and roll small balls from the dough which you put on the tray. Depending of the size you can make 10 – 20 amaretti.
Push in the whole almonds and bake the amaretti for about 10-12 minutes till golden brown.


Sinaasappelbloesem amaretti (14 pcs)
printversie

100 g amandelmeel
100 g rietsuiker
1 eiwit
1 el geconfijte sinaasappelsnippers
1 el sinaasappelbloesem water
14 hele amandelen

Verwarm de oven voor op 200˚ C en bedek een bakplaat met bakpapier.

Doe de rietsuiker in een keukenmachine en maal tot het een stuk fijner is, ongeveer 1 minuut.
Voeg het amandelmeel toe met de geconfijte sinaasappelschil en maal alles nog 15 seconden samen.

Klop het eiwit los in een grote kom tot het flink schuimig wordt, zo halverwege tussen vloeibaar en compleet stijf.

Roer de droge ingrediënten erdoor tot er een deeg ontstaat.
“Was” je handen in het oranjebloesem water en vorm balletjes van het deeg die je op de bakplaat legt. Afhankelijk van de grootte kun je 10 tot 20 amaretti maken.
Druk een amandel in ieder bolletje en bak de amaretti in 10-12 minuten goudbruin.

maandag 16 mei 2011

Quick rustic flatbread – Italiaans platbrood 10 (GF-SF)

I’m very, very glad with my new cookbook Gluten-free Italian, from Jaqueline Mallorca.
I came upon this book via Ina Gawne (thank you Ina!), a reader of Sophies' blog. Ina has this great blog: check it out!

At last I can make my own gluten-free bruschetta and crostini; there are recipes for foccacia, baquettes and even crispy ladyfingers.
Also she makes homemade pasta. I have to try and make it soon, when you read it, it sounds so super easy!

What I like very much in the book is that she makes use of gluten-free flours I use too, like teff, buckwheat, rice, quinoa, oat, millet, coconut, corn and almond flour.
There are great vegetarian dishes in the book, next to soups, anti-pasti, risotto and polenta, pasta, fish and (for the meat lovers) birds, pork, lamb and beef, sweet things, breads, pizza and crostini.
There is information included about celiac disease, gluten-free ingredients and a very useful metric conversions section in the end. I love this book, especially in this season!


I already made the rustic flatbread from the book. It’s very quick and very easy to make. And … it’s very delicious!!

Today I give you the recipe with small changes that I made, I put some teff in it, to make it more wholesome.
Eat the bread the same day or keep it in a cotton bread bag and toast it the next day or make croutons or crostini. You’ll love it!!


Quick rustic flatbread (GF-SF)
printversion
50 g brown rice flour
50 g almond meal
50 g brown teff flour
50 g tapioca starch
70 g potato starch(recipe) or potato flour(I used)
½ tsp sea salt
5 g tartaric acid baking powder
5 g xanthan gum
1 big organic egg
1 tbsp canola oil or other vegetable oil
125 ml full fat yoghurt
125 ml water

Preheat the oven on 205˚C.
Line a baking tray with parchment paper.

Combine the flours and starches together with the salt, tartaric acid baking powder and xanthan gum in a large bowl and mix well.
In a separate small bowl beat the egg and whisk in the oil, yoghurt and water.
Using a plastic or silicon spatula, stir the liquid ingredients into the dry mixture. Stir hard briefly to form a sticky batter that just holds its shape. (yes it’s very sticky!)

Transfer two heaps of dough to the baking tray about 10 cm apart.
Sprinkle lightly with rice flour and pat into 15 cm round or oval mounds.
Dipping your fingertips in the rice flour, “nudge”the edges of each loaf to make them rounded and smooth. (if they are too thin they’ll harden) Slash the loaves from side to side in a cross or other pattern with a sharp knife, 1 cm deep, which will encourage rising.

Bake for about 35 minutes, until golden-brown or till you can knock the bottom.
Transfer the loaves to a wire rack to cool.

You can freeze and reheat any leftovers.
Hard leftovers you can easily transform into breadcrumbs by throwing them into a blender and keep them in a well-closed jar.


Italiaans plat brood 10 (GF-SF)
printversie
50g bruine rijstmeel, plus wat extra voor bestuiven
50 g amandelmeel
50 g bruine teffmeel
50 g tapiocameel
70 g aardappelmeel
½ tl zeezout
5 g wijnsteenzuur bakpoeder
5 g xanthangom
1 groot biologisch ei
1 el koolzaadolie of andere plantaardige olie
125 ml volle yoghurt
125 ml water

Verwarm de oven voor op 205˚C.
Bekleed een bakplaat met bakpapier.

Meng alle meelsoorten in een grote kom samen met het zeezout, wijnsteenzuur bakpoeder en xanthangom goed door elkaar.

Klop in een kleine kom het ei los en voeg olie, yoghurt en water toe, meng goed.
Voeg dit mengsel bij de droge ingrediënten en roer alles goed en snel door elkaar met een plastic of siliconen spatel. Er ontstaat een zeer plakkerig deeg, dat moet.

Verdeel het deeg in 2 hoopjes op de bakplaat, 10 cm uit elkaar en bestrooi met wat rijstmeel. Druk zachtjes met platte hand tot ronde of ovale broden van ongeveer 15 cm doorsnee. Doop je vingers in de rijstmeel en duw de randen rond en glad. Als ze te dun zijn worden ze hard!
Snijd dan met een scherp mes een kruis of ander snijpatroon, ongeveer 1cm diep, in het brood. Dit helpt het rijsproces.

Bak de broden ongeveer 35 minuten tot ze goudbruin zijn en je de onderkant kunt bekloppen. Laat ze op een rooster afkoelen.


Je kunt de broden invriezen of de volgende dag opwarmen/toasten.
Restjes zijn ook prima te gebruiken als broodkruim, gooi de harde broden gewoon in de blender en bewaar in een goed af te sluiten pot.

dinsdag 10 mei 2011

Oatmeal for breakfast – havermout voor ontbijt (GF – DF – SF)


It’s raining cats and dogs this morning. The sky is grey and gloomy. The temperature dropped from 25 to 12 degrees Celsius. Time for a healthy and warming breakfast: oatmeal porridge.
I use the gluten free pure oatmeal from Provena, the only brand in Holland with certified gluten free oats, from Finland. It’s called Kaurahiutale there ;)

Oatmeal has great nutritional value; it’s a good source of iron, magnesium, phosphorus, zinc and Vitamin B1.

I made a very basic porridge, only oats, apricots, water and almonds.
Sometimes, especially after baking (and eating) a lot of strawberry tartlets this weekend, I need simple, plain food. My body needs it, asks for it. It has no big, deep taste and that’s fine. I like cooking with big flavors and a little this and that with my food, a nice sauce or side dish to complete the meal. But I also like basic.

Like today. To be honest, it had a reason too: there was nothing else, no bread, no crackers, no banana, no yoghurt, no quinoa. Because of the beautiful weather we had past weeks, I was not in the mood for shopping, I was in the garden most of the time. As some of you know, I don’t have a garden of my own, but at this moment I have 2 gardens to look after, from friends who are on holiday.

And in my neighborhood there is a group of people, organized in Pro Groen (Pro Green that is) who initiated a picking garden for and by this neighborhood: de Pluktuin. I’m very enthusiast and every day I’m dropping by to do something: sowing flowers and herbs, planting trees and berries, yesterday I planted two kabocha pumkins, two round courgettes and two patissons.
I love gardening!


Back to basic: the recipe

Oatmealporridge with apricots (for 1)

30 g gluten free oatmeal
160 ml water
3 dried non sulphured apricots, chopped in small pieces
1 tbsp almonds, chopped roughly

Cook the oatmeal with the water and apricot pieces about 8 minutes on a low heat. Then put the heat off and a lid on and let it weld for 5 more minutes. Serve in a nice bowl and top with the almonds.
(and if you really want, you can add some palm sugar or another sweetener)


Havermout met abrikozen (voor 1)

30 g glutenvrij havermout
160 ml water
3 gedroogde ongezwavelde abrikozen, in stukjes gesneden
1 el amandelen, grof gehakt

Kook de havermout met het water en de stukjes abrikoos ongeveer 8 minuten op een laag vuur. Doe het vuur uit en een deksel op de pan en laat nog 5 minuten wellen.
Serveer in een mooie kom en bestrooi met de gehakte amandelen.
(als je wilt kun je wat palmsuiker of een andere zoetmaker erover strooien)

zaterdag 7 mei 2011

Strawberry tartlets with frangipane - aardbeitarteletjes met frangipane (GF)

These tartlets I made with frangipane; it’s not a real dough but mostly used as a filling for a sweet pastry. Reading about it, I thought: “Why not try it and use as the dough itself?”
It’s gluten-free and the ingredients must make it very delicious and seem to me even a bit decadent . I reduced the sugar, but kept it in, for stabilizing the dough.

They turned out even better then I thought; even my son was very enthusiast, and that means a lot for a 15-year old hanging around in his pajamas!

I baked them in baking rings, because I was afraid that they wouldn’t come out of the regular wavy tartlet forms. This worked very well, they run just a little. It’s easy to get them out by cutting the rim loose with a sharp knife.
It’s important to let them cool completely, then they get a real good crunch, they centre is moist from the baked strawberries.
When the blueberries arrive I’ll definitely gonna make them with these babies!

There is only one problem: they don’t keep in a tin.
You have to eat them the same day ;) if that’s a problem!!
You can actually keep them, but the color of the strawberries will fade and the crunchiness too, so make and eat!!


Strawberry tartlet (6 pcs)
printversion
110g butter, on room temperature
90g unrefined cane sugar (also called raw demerara sugar, I read)
1 egg
½ vanilla pod, seeds
110g almond flour
10g tapioca flour
¼ tsp sea salt
250g strawberries, cut in pieces
6 baking rings Ø 9 cm or tartlet molds

Preheat the oven on 190˚C.

With a hand mixer or standing mixer you mix the butter and sugar till it’s soft and light colored, about 5 minutes.
Add the egg and vanilla seeds and mix to incorporate for another 3 minutes.
With a silicon spatula you fold in the almond meal, tapioca flour and salt. Not too long!

Butter the inner side of the rings or/and molds. Put them on a baking tray on a sheet of baking paper.
Divide the frangipane over the rings and fill with a layer of sliced strawberries.

Bake in the oven for 20-25 minutes till the crust is golden.
Cool them on a cooling rack.


Aardbeitarteletje (6 stuks)
110g roomboter, op kamertemperatuur
90g pure rietsuiker (ook wel rauwe demerara sugar genoemd)
1 ei
½ vanillestokjes, zaadjes
110g amandelmeel
10g tapiocameel
¼ tl zeezout
250g aardbeien, in stukjes

6 bakringen of tarteletvormpjes van Ø 9 cm

Verwarm de oven voor op 190˚

Klop de roomboter en de suiker met de mixer tot het lichtgekleurd en zacht is, ongeveer 5 minuten. Voeg dan het ei en de vanille toe en klop nog eens 3 minuten.
Meng dan de droge ingrediënten met een siliconen spatel voorzichtig door het botermengsel. Niet te lang!
Beboter de bakringen en/of taartvormpjes en zet ze op een met bakpapier bedekte bakplaat. Verdeel de frangipane over de vormpjes en dan een laag aardbeien.

Bak 20-25 minuten in de oven tot de randen goudbruin zijn.
Laat afkoelen op een rek.

dinsdag 3 mei 2011

Barcelonese salad with butter beans – Barcelonese witte bonensalade (GF-DF-SF)


I made this lunch salad today, when my parents came over.
It has great flavours, it is easy to make and delicious to taste.
Although it’s freezing in the wind, on my balcony it’s hot and sunny.
So a salad and a cup of lentil soup was a great lunch, first the soup to warm you up and then the lovely summery feeling from the salad. And tea and almond cookies in the sun, what else do you need?

Barcelonese salad of big white beans (lunch for 4)
printversion
2 tins of big white beans
1 big onion
1 big ripe tomato
1 big green pepper
2 hard boiled eggs
10 pitted black olives
3 tbs extra vergine olive oil
5 tbs red whine vinegar
Salt and pepper to taste

Let the beans leak in a colander.
Cut the onion in slices and blanch them 2 minutes and cool them.
Grill the green pepper on the gas or grill till it is black and blistered. Put it in a paper bag and let cool too. Peel and cut into squares of 2 ½ cm.
Cut the tomato in thin parts and the eggs in slices. Half the olives.

Put all ingredients in a big bowl and pour in oil and vinegar and season with salt and pepper.
Also very nice as a tapa!


Barcelonese witte bonensalade (4 pers, lunch)
printversie
2 blikjes grote witte bonen
1 grote ui
1 grote rijpe tomaat
1 grote groene peper
2 hardgekookte eieren
10 ontpitte zwarte olijven
3 el extra vergine olive oil
5 el rode wijnazijn
Zout en peper naar smaak

Laat de bonen uitlekken in een vergiet.
Snijd de ui in schijfjes en blancheer 2 minuten. Laat afkoelen
Rooster de groene paprika op de gasvlam of onder de grill tot zwart en geblakerd. Stop de paprika in een papieren zak en laat afkoelen. Haal de schil eraf en het zaad eruit en snijd in vierkantjes van 2 ½ cm.
Snijd de tomaten in 2 en dan in dunne schijfjes en de eieren in plakjes. Halveer de olijven.

Meng alle ingrediënten in een grote schaal en giet de olijfolie en azijn erover. Breng op smaak met zout en peper.
Ook lekker als tapa!