maandag 30 december 2013

Lemon date energy bonbons (GF-DF-V-SF)


Always in search of an easy-to-make and easy-to-take snack, I created these yummy lemon date energy bonbons. Packed with dates and almonds for nutrition, flavor and natural sweetness, these bonbons stay good for weeks. Wrap them in a piece of baking paper or in a small bento box  and you have a healthy energizer with you at all times. A good start of the New Year, dear readers!! Wishing Love, Peace and Health!!

Even after 6 years on a gluten-free diet, I come into circumstances that I forget to take with me something to eat and, especially in colder times like right now, I cannot fill my empty stomach with some cold salad or an apple, as this is the only thing I can eat in Holland when I am on the road. I do need energy from time to time!
So take your food processor and pulse these babies in a few minutes:


1 cup pitted dates
1 cup raw almonds
½ cup raw cashew nuts
5 unsulphured apricots
Zest of 1 organic lemon
1-3 tbsp of lemon juice

Pulse everthing together till it forms into a ball. Add lemon juice to your own taste, start with 1 tablespoon and add more if you like it.
Take the ball out of the bowl and roll into truffle size ball or form into a rectangle log or press into a glass Pyrex mould.
Anyway, let the mixture in the fridge to rest for at least 1 hour and then cut into bars or squares or whatever form you prefer.
Also very good with a cup of tea.

And……you can add any other nut or seed or dried fruit. Be creative!!

woensdag 18 december 2013

Golden tea


Today I like to share with you one of my favorite warming winter drinks.

The recipe is based on turmeric paste, which I have in my fridge all winter;  it’s easy to make and you can add it to any kind of milk to make golden milk, an Ayurvedic classic to help you with any joint pain and to keep your liver happy.

You’ll need:

½ cup of filtered water
¼ cup of turmeric powder

 I love this video, so check it out and make your own health supplement in a pot; it’s really easy!

With the turmeric paste I make this warming golden tea


You’ll need:

1 tsp turmeric paste
1 tsp of raw honey
1 tsp fresh ginger root, peeled and cut fine
boiling water
1 nice cup
maybe a squeeze of lemon

Boil water.
Put turmeric paste, honey and ginger in a cup and fill with boiling water, stir and sip carefully. Add lime or lemon juice if you like it ;-)
If you can, take a real break and drink your golden tea staring out of your window or towards a beautiful plant or flower and imagine the turmeric  healing your aching joints.


The paste can be added to any kind of warm milk, into a rice dish like kichadi or stir a teaspoon into yoghurt.

woensdag 11 december 2013

Winter vegetables green Thai curry part 2


Green curry paste. Since this summer in Thailand I always have a pot in my fridge.

Whipping up a curry is quick and easy, when you have the curry paste ready. You only need coconut milk and the basic Thai ingredients kaffir lime leaf (I buy them frozen in a Chinese supermarket), fresh galangal and lemon grass. You can leave them out and use only your paste; the curry will be nice too, but  the adding of the crushed fresh herbs enhance the flavor to the authentic taste!!


Next time I visit Thailand I hope to get more experienced and learn from the mother of my friend Chumpol, who also happens to know a Thai chef publishing a book right now!! I am waiting for the book to arrive.

The recipe comes from Mai Kaidee’s cooking school and gives the amounts for 1 person. Here you can see one of the very enthusiast cooks at Mai Kaidee’s preparing a green curry.

Because a curry is ready in a sec, after prepping vegetables and cutting herbs, you make the curry per person. The vegetables cook better then and stay crispy.

When you read the recipe you’ll see that there is only 1 handful of vegetables, I use about 250 g because I love my veggies!! You just add a little more coconut milk.

Remember:
1. use the big Thai/Chinese/ spoonful(see my last post).
2. according to the season you can change the vegetables and always have a different kind of curry; for my winter vegetable green Thai curry I used Brussels sprouts, carrot and celery root and sprinkled it with coriander leaves
3. taste, taste, taste and add more flavor to your own liking.
4. when you cannot find Thai basil, just leave it out.
5. I use Aroy-D coconut milk in a 1 liter package, no additives. Because this is a rather thick coconut milk you need some more water; let’s say 3 tablespoons coconut milk need 1 extra tablespoon of water. At Mai Kaidee they prefer Chaokoh coconut milk, but I cannot buy this brand here.


6. prepare everything and set ready in small bowls before you start wokking!
7. I use gluten free tamari instead of the 2 soy sauces.
8. in the end at step 3 you can add pieces of pre baked tofu, or shrimps or fish.
9. eat with a bowl a brown rice or rice noodles.
10. please ask me if you have any questions or suggestions!!


maandag 2 december 2013

Winter vegetables green Thai curry part 1

As I told you lately, I did a cooking course at Mai Kaidee in Bangkok on my last travel to Thailand. Believe it or not, but I think that Mai Kaidee is the only vegan restaurant in the whole of Buddhist Thailand!! Ok, just exaggerating a little. The fact is that fish or poultry and especially broth, which they use in almost every dish!!, don’t count as meat in Thailand. “Is this vegetarian” is not the right question; you have to ask “is there meat, fish, chicken or broth in this dish?????” So you see, that is not an easy one.

Also the Thai people are so incredibly polite and willing to help and be friendly, that they don’t like to say no, or I don’t know. So be aware of this when you visit this beautiful and amazingly friendly country.


Anyway, at Mai Kaidee you can be really sure. They serve delicious modern and traditional Thai vegan cuisine.
The cooking class was great fun, we were with 5 people and a little baby, did 10 dishes in 5 hours, we were talking, cooking, tasting, eating, dancing and singing. All inclusive!! I do recommend it, it was so enjoyable. I learnt a lot, but the most amazing thing I learned there was that Thai recipes in Holland or the internet, and probably elsewhere, talk about using 1 tablespoon of this and that, but the tablespoons they use at Mai Kaidee are much bigger, say 2 sizes; they use these ones


You can imagine that this creates a much bigger taste!
Thai kitchen is easy, quick and healthy. Preparation time is the most time consuming, but with a little music on the side and a smile on your face, preparing becomes fun and when it’s time to cook, everything is ready in a sec! Even my beloved C. is converted to Thai cooking now, and cooks it every 2 days or more. He even lost some excess weight (just a little, don’t worry)!!

Today I give you 2 versions of the Green Chili Paste of Mai Kaidee: 1 is the original and 2 is the version I made for children and other people who don’t like heat, without the chilies but with the same maximum taste.
The paste keeps well in a clean glass pot in the fridge for up to 2 weeks or even more.

Mai Kaidee’s Green Chili Paste

Blend the following ingredients with a mortar and pestle or in a blender:

2 tbsp green chilies, about 10 Thai chilies, chopped up, with seeds and all
1 tbsp kaffir lime leaf, I use frozen, tear the stems out and cut up fine
1 tbsp galangal, slices unpeeled
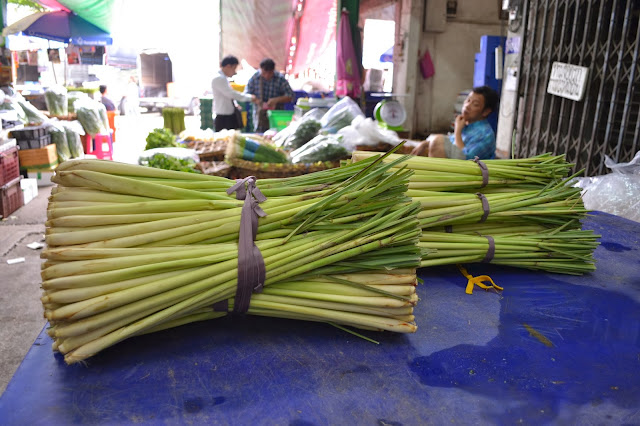
1 tbsp lemon grass, outer leaves discarded, inner softer part in small rings
1 tbsp onion, cut roughly
1 tbsp garlic, cut fine
1 tbsp cumin powder
½ tbsp of miso

                                  (picture found on Google images)


My child-friendly chili paste

2 tbsp or ½ green bell pepper, cleaned and deseeded, chopped roughly
And the same ingredients as above: 1 tbsp each of
Kaffir lime leaves
Galangal
Lemon grass
Onion
Garlic
Cumin powder
½ tbsp of miso

Next post will be the lovely winter root vegetables green curry I made with this chili paste!!

See you soon.
Related Posts Plugin for WordPress, Blogger...