maandag 30 december 2013

Lemon date energy bonbons (GF-DF-V-SF)


Always in search of an easy-to-make and easy-to-take snack, I created these yummy lemon date energy bonbons. Packed with dates and almonds for nutrition, flavor and natural sweetness, these bonbons stay good for weeks. Wrap them in a piece of baking paper or in a small bento box  and you have a healthy energizer with you at all times. A good start of the New Year, dear readers!! Wishing Love, Peace and Health!!

Even after 6 years on a gluten-free diet, I come into circumstances that I forget to take with me something to eat and, especially in colder times like right now, I cannot fill my empty stomach with some cold salad or an apple, as this is the only thing I can eat in Holland when I am on the road. I do need energy from time to time!
So take your food processor and pulse these babies in a few minutes:


1 cup pitted dates
1 cup raw almonds
½ cup raw cashew nuts
5 unsulphured apricots
Zest of 1 organic lemon
1-3 tbsp of lemon juice

Pulse everthing together till it forms into a ball. Add lemon juice to your own taste, start with 1 tablespoon and add more if you like it.
Take the ball out of the bowl and roll into truffle size ball or form into a rectangle log or press into a glass Pyrex mould.
Anyway, let the mixture in the fridge to rest for at least 1 hour and then cut into bars or squares or whatever form you prefer.
Also very good with a cup of tea.

And……you can add any other nut or seed or dried fruit. Be creative!!

woensdag 18 december 2013

Golden tea


Today I like to share with you one of my favorite warming winter drinks.

The recipe is based on turmeric paste, which I have in my fridge all winter;  it’s easy to make and you can add it to any kind of milk to make golden milk, an Ayurvedic classic to help you with any joint pain and to keep your liver happy.

You’ll need:

½ cup of filtered water
¼ cup of turmeric powder

 I love this video, so check it out and make your own health supplement in a pot; it’s really easy!

With the turmeric paste I make this warming golden tea


You’ll need:

1 tsp turmeric paste
1 tsp of raw honey
1 tsp fresh ginger root, peeled and cut fine
boiling water
1 nice cup
maybe a squeeze of lemon

Boil water.
Put turmeric paste, honey and ginger in a cup and fill with boiling water, stir and sip carefully. Add lime or lemon juice if you like it ;-)
If you can, take a real break and drink your golden tea staring out of your window or towards a beautiful plant or flower and imagine the turmeric  healing your aching joints.


The paste can be added to any kind of warm milk, into a rice dish like kichadi or stir a teaspoon into yoghurt.

woensdag 11 december 2013

Winter vegetables green Thai curry part 2


Green curry paste. Since this summer in Thailand I always have a pot in my fridge.

Whipping up a curry is quick and easy, when you have the curry paste ready. You only need coconut milk and the basic Thai ingredients kaffir lime leaf (I buy them frozen in a Chinese supermarket), fresh galangal and lemon grass. You can leave them out and use only your paste; the curry will be nice too, but  the adding of the crushed fresh herbs enhance the flavor to the authentic taste!!


Next time I visit Thailand I hope to get more experienced and learn from the mother of my friend Chumpol, who also happens to know a Thai chef publishing a book right now!! I am waiting for the book to arrive.

The recipe comes from Mai Kaidee’s cooking school and gives the amounts for 1 person. Here you can see one of the very enthusiast cooks at Mai Kaidee’s preparing a green curry.

Because a curry is ready in a sec, after prepping vegetables and cutting herbs, you make the curry per person. The vegetables cook better then and stay crispy.

When you read the recipe you’ll see that there is only 1 handful of vegetables, I use about 250 g because I love my veggies!! You just add a little more coconut milk.

Remember:
1. use the big Thai/Chinese/ spoonful(see my last post).
2. according to the season you can change the vegetables and always have a different kind of curry; for my winter vegetable green Thai curry I used Brussels sprouts, carrot and celery root and sprinkled it with coriander leaves
3. taste, taste, taste and add more flavor to your own liking.
4. when you cannot find Thai basil, just leave it out.
5. I use Aroy-D coconut milk in a 1 liter package, no additives. Because this is a rather thick coconut milk you need some more water; let’s say 3 tablespoons coconut milk need 1 extra tablespoon of water. At Mai Kaidee they prefer Chaokoh coconut milk, but I cannot buy this brand here.


6. prepare everything and set ready in small bowls before you start wokking!
7. I use gluten free tamari instead of the 2 soy sauces.
8. in the end at step 3 you can add pieces of pre baked tofu, or shrimps or fish.
9. eat with a bowl a brown rice or rice noodles.
10. please ask me if you have any questions or suggestions!!


maandag 2 december 2013

Winter vegetables green Thai curry part 1

As I told you lately, I did a cooking course at Mai Kaidee in Bangkok on my last travel to Thailand. Believe it or not, but I think that Mai Kaidee is the only vegan restaurant in the whole of Buddhist Thailand!! Ok, just exaggerating a little. The fact is that fish or poultry and especially broth, which they use in almost every dish!!, don’t count as meat in Thailand. “Is this vegetarian” is not the right question; you have to ask “is there meat, fish, chicken or broth in this dish?????” So you see, that is not an easy one.

Also the Thai people are so incredibly polite and willing to help and be friendly, that they don’t like to say no, or I don’t know. So be aware of this when you visit this beautiful and amazingly friendly country.


Anyway, at Mai Kaidee you can be really sure. They serve delicious modern and traditional Thai vegan cuisine.
The cooking class was great fun, we were with 5 people and a little baby, did 10 dishes in 5 hours, we were talking, cooking, tasting, eating, dancing and singing. All inclusive!! I do recommend it, it was so enjoyable. I learnt a lot, but the most amazing thing I learned there was that Thai recipes in Holland or the internet, and probably elsewhere, talk about using 1 tablespoon of this and that, but the tablespoons they use at Mai Kaidee are much bigger, say 2 sizes; they use these ones


You can imagine that this creates a much bigger taste!
Thai kitchen is easy, quick and healthy. Preparation time is the most time consuming, but with a little music on the side and a smile on your face, preparing becomes fun and when it’s time to cook, everything is ready in a sec! Even my beloved C. is converted to Thai cooking now, and cooks it every 2 days or more. He even lost some excess weight (just a little, don’t worry)!!

Today I give you 2 versions of the Green Chili Paste of Mai Kaidee: 1 is the original and 2 is the version I made for children and other people who don’t like heat, without the chilies but with the same maximum taste.
The paste keeps well in a clean glass pot in the fridge for up to 2 weeks or even more.

Mai Kaidee’s Green Chili Paste

Blend the following ingredients with a mortar and pestle or in a blender:

2 tbsp green chilies, about 10 Thai chilies, chopped up, with seeds and all
1 tbsp kaffir lime leaf, I use frozen, tear the stems out and cut up fine
1 tbsp galangal, slices unpeeled
1 tbsp lemon grass, outer leaves discarded, inner softer part in small rings
1 tbsp onion, cut roughly
1 tbsp garlic, cut fine
1 tbsp cumin powder
½ tbsp of miso

                                  (picture found on Google images)


My child-friendly chili paste

2 tbsp or ½ green bell pepper, cleaned and deseeded, chopped roughly
And the same ingredients as above: 1 tbsp each of
Kaffir lime leaves
Galangal
Lemon grass
Onion
Garlic
Cumin powder
½ tbsp of miso

Next post will be the lovely winter root vegetables green curry I made with this chili paste!!

See you soon.

zaterdag 23 november 2013

Thai-flavoured lentil pumpkin soup - Thai geïnspireerde linzen pompoensoep (GF-DF-SF-V)


Today I want to share with you this very nice Thai-flavoured pumpkin lentil soup.
It’s soup-time for me; to keep me warm and my intestines happy I make a soup every 2 or 3 days; it’s like making a smoothie in spring and summer, but hot.

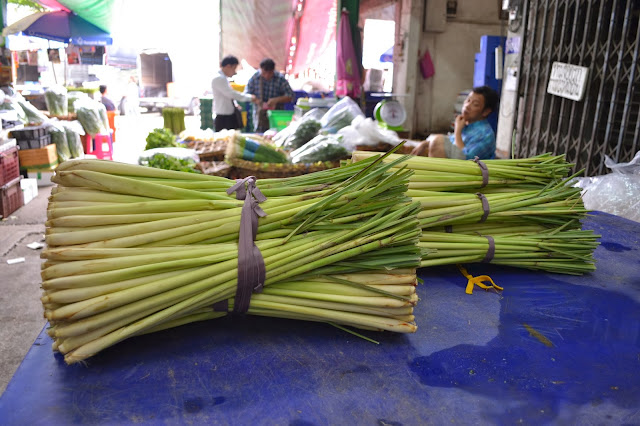
The flavour in this soup comes from the herbs I cook in the soup: galangal, kaffir lime leaves and lemongrass, without those 2 you cannot cook a Thai dish!

When you have the ingredients at home (you can freeze the kaffir lime leaves and lemon grass stalks, not the galangal because it looses its flavour) it’s a very easy and simple soup to prepareJ

Voor mijn Nederlandse lezers: Onderaan staat de Nederlandse versie van het recept!


Thai-flavoured pumpkin lentil soup (4-5 pers)

1 l water
4 kaffir lime leaves
4 slices of galangal
1 big fat lemon grass stalk
8 stalks of coriander
1 pierced red chilie, when you want some heat, but when to eat with children leave it out and sprinkle some chilie flakes after serving, for the heat lovers.
1 medium onion, chopped in 8
1 clove of garlic, chopped roughly
½ cup red lentils 
500g cleaned and cubed butternut squash
200g cleaned and cubed carrot
4 tbsp tamari or light soy sauce
250 ml coconut milk
1-2  tbsp lime juice

1. Pour the water in a soup pot and bring to the boil.
2. Make a bundle of the lemon grass, galangal, kaffir lime leaved and coriander stalks, bind with a piece of thread. Put in the water.
3. In the meantime clean and chop the vegetables.
4. When the water boils add all vegetables and the red lentils and cook softly till everything is tender, about 20 minutes.
5. Remove the herbs from the soup, add coconut milk and tamari and blend your soup till smooth.
6. Taste and adjust when necessary.
7. Serve with some sprinkled coriander and lime juice.

8. Enjoy!!


Thai linzen pompoensoep (4-5 pers)

1 liter water
4 kaffir limoen blaadjes
4 schijfjes galangal
1 dikke stengel citroengras
8 korianderstengels
1 rode peper, met mes ingeprikt als je van pittig houdt, maar als je voor kinderen kookt eruit laten en je eigen soep besprenkelen met chiliflakes
1 ui, in 8 stukken gehakt
1 teen knoflook, grof gehakt
1/2 cup/ 125 ml rode linzen
500g schoongemaakte fles- of andere pompoen, in blokjes
200g schoongemaakte wortel, in blokjes
4 el tamari of lichte soyasaus
250 ml kokosmelk
limoensap
korianderblaadjes
chiliflakes

1. Breng 1 liter water aan de kook in een soeppan.
2. Maak van de kaffir lime blaadjes, galangal, korianderstengels en citroengras een kruidenbuiltje,met een touwtje en voeg aan het water toe.
3. Maak alle groentes schoon.
4. Als het water kookt, voeg de groentes en rode linzen toe en kook alles zachtjes, ongeveer 20 minuten, tot de groentes gaar zijn.
5. Haal het kruidenbuiltje uit de soep en voeg tamari en kokosmelk toe.
6. Proef en pas de smaak eventueel aan.
7. Serveer met een kneep limoen en wat gehakte verse koriander en eventueel wat chiliflakes.
8. Geniet!

vrijdag 15 november 2013

buckwheat apple muffins (GF- SF- V)


On this really gorgeous sunny november friday I just got the impulse to start blogging again.
It was never on my mind that my summer break would last till now, but it just happened ;-)

First I went to Thailand with C. and we had such a great time with our old and new friends; we discovered some new upcoming areas in Bangkok, made a lot of pictures, ate the best food, since we now went to dinner with our Bangkok friends who know the best places to eat out. We went to the coastal area near the Birma border, which we visited as well. 
After coming back to Holland 2 of our best Thai friends came to Rotterdam and stayed with us for a week!! We had so much fun, it was their first time in Holland  and seeing your own country through the eyes of a visitor is so refreshing. We had a holiday too!!

By the way, I did a Thai vegan cooking class!! I will blog about that another time.


As you can see time went by (and Blogger is doing strange things again??)

For my health I did an elimination diet for 6 weeks to find out that potatoes are triggering my immune system and develop inflammation in my joints. It was not too hard, the diet, pure vegan for 4 weeks and after that introducing all foods again. It kept me quite occupied and I fell ill rather badly after introducing potatoes. But now I am feeling much better and I want to stick as much as possible to a vegan diet. I will eat an egg, some yoghurt and a piece of salmon from time to time, because I can feel rather weak and then I know that I need a little extra.

Since 2 years I am a member of a great yoga community on the internet and just this week I started sharing recipes there as well for the members. When you're interested you can check out on YouTube where Melissa West, my yoga teacher, shares weekly free yoga videos!!
I am really excited about this new adventure. It boosts my creativity and so I am back blogging and sharing with you again.

2 Weeks ago we did an at home yoga retreat in the weekend and I contributed with these tasty vegan muffins:


Buckwheat apple muffins (SF-GF-Vegan) (6-8)

dry ingredients:
3/4 cup buckwheat flour
1/2 cup almond flour
1 tsp tartaric acid baking powder
1 big tsp cinnamon
1/4 tsp sea salt

wet ingredients:
1 cup applesauce
1 large mashed banana
2 tbsp ground flax seeds in 2 tbsp water, let sit for 2 minutes
2 tbsp agave syrup or honey orother sweetener,or leave it out completely
2 tbsp extra virgin olive oil or melted coconut oil
1 tsp vanilla extract

1/4 cup chopped walnuts

Pre-heat your oven on 180 degrees C. Line a muffin pan with cupcake liners. 

In a big bowl mix the dry ingredients. Set aside.

In a smaller bowl mix the wet ingredients. If using coconut oil, softly melt the oil with the cinnamon, before adding to the applesauce and banana mixture.

Scoop the wet into the dry ingredients and mix quickly and well with your spoon.
Spoon the batter/dough into the prepared muffin pan, sprinkle each one with some chopped walnuts and bake these delicious muffins into the middle of the oven for about 25 minutes. Let them cool before you remove them from the pan.


boekweit appel muffins (SF-GF-V)

 droge ingrediënten:
3/4 cup boekweitmeel
1/2 cup amandelmeel
1 tl wijnsteenzuur bakpoeder
1 flinke tl kaneel
1/4 tl zeezout

natte ingrediënten:
1 cup appelmoes, vers gemaakt
1 grote rijpe banaan, fijngeprakt
2 el gemalen lijnzaad, in 2 el water 2 minuten geweld
2 el agave siroop, honing of andere zoetmaker, kan ook weggelaten worden!!
2 el extra virgin olijfolie
1 tl vanille extract

1/4 cup gehakte walnoten

Verwarm de oven voor op 180 graden C.
Bekleed een muffin pan met papieren vormpjes.

Meng alle droge ingrediënten in een grote kom. Zet even apart.

Meng in een kleinere kom de natte ingrediënten goed door elkaar en giet deze bij de droge ingrediënten.
roer snel door elkaar en schep een flinke eetlepel in elke muffin vorm.
Strooi wat gehakte walnoten op elke muffin en bak deze heerlijke herfstmuffins in het midden van de voorverwarmde oven ongeveer 25 minuten. Laat afkoelen voordat je ze uit de vorm haalt.
Geniet ervan en laat me horen wat je ervan vindt!

maandag 15 juli 2013

Cucumber lassi – komkommer lassi (GF-SF)


At last we have some great days with enough sunshine to make cold drinks.
I am not a cold drink lover, I stick with tea most of the time, it’s rather cooling, a hot drink in warm weather. Your body is going in cooling mode when drinking hot tea.

This weekend I made this really refreshing and healthy cucumber lassi.
I don’t know if it exists in India, lassi made with cucumber, but anyway it’s the same principle: ice cold yoghurt with water and flavoring, sweet or savory, but always yummy.
It’s food and drink combined. And easy to make.

Cucumber lassi
2 cucumbers, peeled, in big chunks
1-2 cloves of garlic, diced roughly
15 fresh mint leaves
2 tbsp chopped fresh dill
350 ml organic full fat yoghurt
10 white (skinless) almonds
Salt and pepper, to taste
350 ml or more ice cold water

Everything in the blender, taste, adapt and drink!! Enjoy!!

Komkommer lassi
2 komkommers, geschild, in grote stukken
1-2 tenen knoflook, grofgehakt
15 verse munt blaadjes
2 el verse dille, gehakt
350 ml biologische volle yoghurt
10 witte amandelen
Zout en peper
350 ml ijskoud water

Alles in de blender, proef, pas eventueel de smaak aan en drink!! Geniet!!

vrijdag 21 juni 2013

Almost green gazpacho – bijna groene gazpacho (GF-SF)


In the line of easy, fast, green and versatile recipes I made this beautiful gazpacho this weekend.
The sun was out for a change, and on my tiny balcony on the south side the wind had no influence so I came to the idea of a cold soup.

With all there was in my fridge and the herbs and very ripe avocado that I was forgotten, I made this  gazpacho or cold soup or maybe you could call it even a veggie smoothie. Anyway you name it, it’s delicious, lusciously smooth because of the almonds  and all the raw goodness of all these veggies and herbs! it's easy to make vegan, just leave out the yoghurt!

It’s a long list of ingredients, but all you have to do is wash the veggies and chop them roughly and throw them in a blender. Add anything you like more or less to your own tastes. This soup is all about tasting. You don’t have a green bell pepper, just use a red or yellow one, like I did. You don’t have a cucumber, maybe you have a zucchini. The same with the herbs, use what you have, sniff and taste and make your own heavenly blend.

Depending on the thickness, the amounts of liquids, this recipe makes about 1 liter of soup.

Almost green gazpacho

1 big celery stick
½ cucumber
2 handfuls of turnip tops (you could use spinach )
1 red bell pepper
1 avocado (or when not in the house just leave it out)
2 spring onions
1 clove of garlic
1 big handful of basil
1 big handful of parsley
1 big handful of coriander/cilantro
A few leaves of mint
75 g almond meal or ground whole brown almonds
2 tbsp fragrant vinegar like dandelion or cider
60 ml good olive oil
125 ml of full fat organic yoghurt (vegans can leave it out)
250 ml or a little more cold water
1 tsp sea salt
Ground pepper
Lemon juice to your taste

Clean and chop the veggies and fresh herbs roughly.
Add everything to a powerful blender and blend into a smooth soup.
Taste and add seasoning to your liking.
Eat it directly or cool the soup for several hours in the fridge.


                                           not very appealing as a picture, but very delicious


Bijna groene gazpacho

1 flinke bleekselderijstengel
½ komkommer
2 handenvol raapstelen (of jonge spinazie)
1 rode paprika (of groen of geel)
1 avocado (als je die hebt, anders niet)
2 lente uitjes
1 teen knoflook
1 grote handvol basilicum
1 grote handvol peterselie
1 grote handvol koriander
Paar blaadjes munt
75 g amandelmeel, of  gemalen niet-geblancheerde amandelen
2 el geurige azijn, zoals paardenbloem of cider
60 ml lekkere olijfolie
125 ml volle biologische yoghurt (of laat weg als je vegan bent)
250 ml of iets meer water
1 tl zout
Gemalen zwarte peper
Citroensap naar smaak

Maak de groentes schoon en hak ze grof, zo ook de kruiden.
Doe alles in een grote blender en mix tot een mooie romige soep.
Proef en voeg naar smaak toe wat de soep nog nodig heeft.
Eet direct of laat een aantal uren in de koelkast koelen.

woensdag 12 juni 2013

Another green recipe! Cucumber and celery relish – komkommer- en groenselderij relish (GF-DF-SF-V)


So funny, this month I am only sharing green recipes, must be something in the air ;-)

This recipe came with my organic vegetable box from the Landzicht farm. It’s an easy and quick made relish, simple ingredients with maximum taste. I eat the relish on a sandwich, together with some fatty fish like mackerel or on anything which needs a tangy zing!

I keep my blog posts short, because I cannot work for more than 20 minutes at my laptop now, my aching bones won’t allow it yet. So I take good care of myself and listen to my body.

You have a favorite relish or pickle? Let me know!

Cucumber  and celery relish (1 big pot)

1 cucumber, washed and cut in brunoise
6 stalks of celery, washed, cleaned and cut in brunoise
2 tsp sea salt
½ cup white wine vinegar or rice vinegar
4 tbsp honey or agave syrup
1 tbsp fresh ginger, cut very fine
1 tbsp black mustard seed
1 tsp black peppercorns, crushed roughly

Bring vinegar, honey or agave, ginger and mustardseed to the boil. Immediately add cucumber, celery, salt and crushed peppercorns and stir together very well. Let it cook slowly for 5 minutes, than turn of the gas. Fill your (well cleaned) pot(s) with the mixture, close with a lid and let them cool upside down.
Store in the fridge, it will hold for at least 2 weeks for sure!


Komkommer-groenselderij relish (1 grote pot)

1 komkommer, in fijne brunoise
6 stengels groenselderij of bleekselder
2 tl zeezout
125ml witte wijnazijn of rijstazijn
4 el honing of agave siroop
1 el verse gember, zeer fijngesneden
1 el zwart mosterdzaad
1 tl zwarte peperkorrels, geplet

Breng azijn, honing, gember of agave en mosterdzaad aan de kook. Voeg meteen de fijngesneden komkommer en selder toe, het zout en de geplette peperkorrels. Roer goed door elkaar en laat 5 minuutjes zachtjes koken. Haal van het vuur en vul een of meerdere (goed schoongemaakte) potten met het mengsel. Zet op zijn kop en laat afkoelen. Bewaar in de koelkast, blijft zeker 2 weken goed!!

zaterdag 8 juni 2013

Green beans, potato and cucumber salad – spercieboon, aardappel en komkommer salade (GF-DF-SF-V)


This evening I’m going to eat with my friend M. and her son.
In her garden, in the sun, with some veggie and some fishy things on the BBQ, a glass of rosé and this great salad, which I prepared already, so all flavors can blend together and the salad is chilled. We have sunshine at last and are going to celebrate it.

The great thing about this salad is the perfect and simple combination of ingredients.
The salad is inspired by a recipe from The New Vegetarian Epicure, by Anna Thomas. It’s already an “old” book, from 1996, no pictures in the book, only recipes for every season. She is California based and it’s always a pleasure to read her stories about food, it’s sunny, it’s earthy, it’s all about good ingredients. I love this book!
Speaking of love; her latest book is called Love Soup and as a soup lover I will order it soon and let you know all about it.

Green beans, potato and cucumber salad (enough for 6 pers)

750 grams new potatoes, washed
350 grams French beans
350 grams cucumber
½ cup coarsely chopped fresh dill
¼ cup finely chopped red onion
2 big tbsp good olive oil
2 big tbsp freshly squeezed lemon juice
½ tsp sea salt
½ tbsp agave syrup
1 full tsp Dijon mustard
freshly ground black pepper

First boil the potatoes in plenty of water, depending of their size, about 15-20 minutes. They must be just done. Prick in them with a fork to be sure. Drain and let them cool for a little while, so you can just handle them to remove the skin and slice into big cubes.

In the time the potatoes are boiling, clean the beans, cut them in 2 cm pieces and cook or steam them for about 10-12 minutes till al dente. Drain and put them in a big bowl.

In the time the beans are cooking you cut the onion, dill and cucumber. Set aside.

And you make the dressing by stirring together (or put everything together in a glass jar and shake it) the olive oil, lemon juice, salt, pepper, agave syrup and black pepper. Set aside too.

When the potatoes are cut, put the chunks on top of the beans in the big bowl and pour over the dressing. Then add the dill, onion and cucumber cubes and mix everything together gently with your hands. Refrigerate for some hours to blend all the flavours and chill the salad well.
Enjoy on a warm evening  or as a lunch dish!


Sperzieboon, aardappel en komkommer salade (genoeg voor 6 pers)

750 gr nieuwe aardappels, gewassen
350 gr sperziebonen
350 gr komkommer
½ cup versgehakte dille
¼ cup fijngehakte rode ui
2 volle el goede olijfolie
2 volle el versgeperste citroensap
½ tl zeezout
½ el agavesiroop
1 volle tl Dyon mosterd
versgemalen zwarte peper

Kook de gewassen aardappels net gaar. Afhankelijk van de grootte 15-20 minuten. Prik af en toe voorzichtig met een vork. Giet af en laat even afkoelen voordat je de schil er voorzichtig afhaalt. Snijd ze in flinke stukken.

Terwijl de aardappels koken haal je de boontjes af, snijd ze in 2 cm stukjes en kook of stoom ze al dente, 10-12 minuten. Giet af en laat even uitlekken. Doe ze in een ruime kom.

Als de boontjes koken snijd je de ui, de komkommer en dille.
En maak de dressing door olijfolie, citroensap, zout, peper, agavesiroop en zwarte peper goed te vermengen of je doet alles in een jampot met deksel en schud de pot flink.. Zet apart.

Als de aardappels klaar zijn doe je de nog warme blokjes op de bonen. Giet eerst de dressing erover en dan de ui, dille en komkommer. Meng alles voorzichtig met je handen.
Laat de salade zeker een paar uur afkoelen in de koelkast tot gebruik.

Geniet op een warme avond of als een heerlijk lunchgerecht.

maandag 3 juni 2013

Socca with shaved green asparagus (GF-SF-DF-V)


Every season there are some dishes coming back in my kitchen again and again.
Socca is one of them. It’s a traditional dish from Nice, made from chickpea flour and really easy to make. You can eat it as a side dish, a snack or a flat bread, you can even turn the socca into a pizza when you top it with some roasted tomatoes, onions and olives or with some mozzarella cheese.
Originally socca is made in a flat copper pan which is put in a boiling hot pizza oven. I don’t have this equipment, so I make it in my oven on the highest heat in a cast iron skillet. This works very well and it’s delicious.
                              
I made this socca with shaved green asparagus.
It’s also very good with very young artichokes. Just clean them and slice very thinly; keep them in some lemony water till you use them, otherwise they’ll turn brown.

Socca

125 g chickpea flour
350 ml water
a pinch of seasalt
freshly ground black pepper
2 tbsp olive oil
2-4 green asparagus

cast iron skillet, 23 cmØ
                                             
Sift the flour in a bowl and make a well in the middle. Pour in the water bit by bit and stir together into a thin batter. Stir vigorously to stir out the lumps. Add salt and pepper and stir in the olive oil. Let it rest for half an hour or more.

Pre heat the oven on highest heat and oil the skillet lightly with some olive oil.
Shave the asparagus thinly on a mandoline.
Put the skillet in the hot oven for some minutes till it’s really hot and take it out with some oven-gloves (take care: hot, hot!).
Pour in half of the socca batter, sprinkle with the shaved asparagus and put it back into the oven. Bake the socca till it’s dry on top and golden brown, this will take about 10-13 minutes . It will bubble and brown on the edges. Good! Socca is a rough type, not a fine crepe. Cut it into pieces and maybe serve with some extra sea salt and pepper. Or with some roasted tomatoes on the side or a piece of fresh goat's cheese.
Close your eyes and imagine you’re in the Provence. The taste is great!!

  
Socca met geschaafde groene asperges

125 g kikkererwtenmeel
350 ml water
Zout en versgemalen peper
2 el olijfolie
2-4 groene asperges
Gietijzeren skillet/ koekenpan 23 cmØ

Zeef het meel in een kom en maak een kuiltje in het midden. Giet het water beetje bij beetje erbij en roer krachtig tot een dun beslag zonder klontjes. Voeg dan peper en zout naar smaak toe en roer de olijfolie erdoor.
Laat minimaal een half uur rusten.

Verwarm de oven voor op de hoogste stand.
Vet de skillet in met olijfolie en zet enkele minuten in de hete oven tot hij gloeiend heet is.
Schaaf ondertussen de asperges heel dun op een mandoline of groenteschaaf.
Haal de hete pan eruit (Met ovenwanten, want hij is zeer heet nu!!) en giet de helft van het beslag in de pan.
Besprenkel snel met de helft van de asperges en zet terug in de oven.
Bak tot de socca droog is en goudbruin. De socca mag lekker hard gebakken worden aan de randjes maar een beetje zacht van binnen blijven. Haal uit de oven en herhaal het proces met het overgebleven beslag.
Snijd de socca in stukken en bestrooi nog met wat peper en zout en evt. wat olijfolie. Eet zo lekker warm of serveer met een geroosterd tomaatje en wat geitenkaas.
Doe je ogen even dicht en proef de Provence!                               

zondag 26 mei 2013

My basic gluten-free cruesli – mijn basis glutenvrije cruesli (GF-DF-SF-V)

 
I like to share with you my basic gluten-free cruesli recipe.
I use this recipe for years now and the nice thing about it is, that it’s easy to make and easy to alter. You can add hazelnuts or walnuts instead of almonds, you can use buckwheat flakes or quinoa flakes and after baking it’s great to add some chocolate chips or dried blueberries or pieces of dried apricots or whatever dried fruit you have in your cupboard. Make it to you’re your own liking. Store it in an airtight glass container; it will keep for several months.

For a big jar you’ll need:

300g gluten free rolled oats (Provena)
20g gluten free rice puffs
75 g pumpkin and/or sunflower seeds
2 tbsp flax seeds
65 g roughly slivered almonds
1 tbsp butter, vegetable oil or coconut oil for vegans
¼ tsp sea salt
80 ml water
80 ml maple syrup or honey
1 tbsp vanilla extract

Pre heat the oven on 150 ˚C.
Put a piece of baking paper on the baking tray.

Mix the dry ingredients from oats till almonds in a big bowl.
In a small saucepan heat the wet ingredients from oil/butter till vanilla extract, stir till the sugar is dissolved. Pour into the dry ingredients and mix everything well.
Scoop onto the baking tray and spread well and put it in the middle of the oven.
Bake for 45 minutes and stir every 15 minutes so that  the granola bakes evenly.
Let it cool completely before storing into an airtight glass container.
Eat as you like, as a snack, as a topping, with fruits and yoghurt, for breakfast or pudding. 


Voor een grote glazen pot vol heb je het volgende nodig:

300g glutenvrije havervlokken
20g glutenvrije gepofte rijst
75 g pompoen- en/of zonnebloempitten
2 el lijnzaad
65 g grof gehakte amandelen
1 el boter, kokosolie of andere plantaardige olie
¼ tl zeezout
80 ml water
80 ml ahornsiroop of honing
1 el vanille extract

Verwarm de oven voor op 150 ˚C.
 Bekleed een bakplaat met een vel bakpapier.

Meng de droge ingrediënten van haver tot amandelen in een grote kom.
Verhit de natte ingrediënten van boter/olie tot vanille extract in een steelpan en roer tot de suiker is opgelost. Giet bij de droge ingrediënten en roer alles heel goed door.
Schep op de bakplaat en spreidt goed uit, schuif in het midden van de oven.
Bak de cruesli 45 minuten en schep iedere 15 minuten goed door, zodat de cruesli evenredig bakt. Laat helemaal afkoelen voordat je de cruesli overdoet in een luchtdichte glazen pot.
Eet zoals je wilt, een handje als snack, als topping op een toetje, bij de yoghurt, met fruit als ontbijt of lunch.

Related Posts Plugin for WordPress, Blogger...