Posts tonen met het label saus. Alle posts tonen

vrijdag 15 september 2017

2 keer sambal– sambal 2 ways (GF-SF-DF-V)


Na de overvloed aan courgettes is er nu een overvloed aan rode pepers in de tuin. Ook op de markt liggen, letterlijk, bergen pepers in allerlei vormen en kleuren.


Een makkelijke en heerlijke manier om pepers te conserveren is er sambal van te maken. Ik heb er 2 gemaakt: sambal ulek of oelek, een rauwe versie en sambal brandal, een gebakken.

Sambal ulek
De gemakkelijkste van de 2:

20 rode pepers
1 tl zout

Was en hak de rode pepers, maal of vijzel ze grof in keukenmachine of vijzel of tjobek, met het zout.
Je kunt de zaadlijsten en zaadjes erin laten of eruit halen. 
Met is heter en zonder is wat fijner.

Schep in een schoon jampotje en bewaar in de koelkast.
Blijft heel lang goed. Gebruik wel altijd een schone lepel als je er wat uitschept.

Sambal brandal
Een gebakken sambal met als extra wat cherry tomaatjes:

15-20 rode pepers
10-15 cherry tomaatjes
1 uitje, fijngehakt
5 tenen knoflook, fijngehakt
5 kemirienoten
1 el trassi
1 el gula djawa of palmsuiker
1 tl zout
2 el arachideolie

Was en snijd pepers en tomaten grof en doe ze in de vijzel of keukenmachine met de fijngesnipperde ui, fijngesneden knoflooktenen, de kemirienoten en de trassi. Maal tot een grof geheel.

Verwarm de olie in een wok met dikke bodem en bak daarin de pepermassa op middelhoog vuur, terwijl je veel roert om aanbakken te voorkomen. Voeg gula djawa en zout toe en blijf zachtjes bakken tot het heldere rood verandert in een wat zwaardere kleur of totdat de olie zich afscheidt. Ongeveer 20 minuten.

Schep in een grote pot of in 3 kleine potjes; ik spaar altijd de potjes van kappertjes.


Sambal is heerlijk bij ieder Indonesisch gerecht, waarvan binnenkort een aantal op dit blog, maar ook op een boterham met pindakaas. Binnenkort ook een heel nieuw broodrecept!!


After the abundance of zucchini there is an overflow of chilies in the garden and on the markets now.
What better way to preserve your chillies is to make sambal!


I made 2: a raw one, sambal ulek and a fried one: sambal brandal. 

They both keep very well in a clean pot in the fridge and are delicious with any Asian or specificly Indonesian dish, (soon I’ll share some on the blog) or on a peanut butter sandwich :-). Also soon a brand new gluten free bread recipe. Stay tuned!

Sambal ulek
The easiest one:

20 red chilies
1 tsp salt

Wash and cut the chillies roughly, and grind them with the salt in a small food processor or use the tjobek or stone mortar and oelekan or pestle and use your muscles.
You can leave the seeds in or take them out. With the seeds in the sambal gets more heat and is more rustic and without it gets a milder flavour and mouth feel.
Always use a clean spoon when using, keeps long time in the fridge.

Sambal brandal
a baked sambal with an extra flavour of cherry tomatoes:

15-20 red chilli peppers
10-15 cherry tomatoes
1 small onion, chopped
5 cloves of garlic, chopped
5 candle nuts
1 tbsp trassi (terasi or fermented shrimp paste)
1 tbsp gula djawa or palm sugar
1 tsp salt
2 tbsp vegetable oil

Wash chillies and tomatoes, cut them roughly and grind them in the food processor or with mortar and pestle together with the chopped onion and garlic, the candle nuts and the trassi into a rough mixture.
Heat the oil in a heavy wok and fry the mixture on medium heat, while stirring occasionally. After 5 minutes add the gula djawa and salt and keep stirring till the colour changes from bright red to a more deep orangy red, about 20 minutes.

Scoop in a big pot or divide over 3 small ones. Keeps in the fridge like the sambal ulek.


vrijdag 9 juni 2017

glutenvrije falafel - glutenfree falafel - highlighting old recipes


Een weekend recept. Vandaag wil ik mijn "oude"recept van falafel maar eens onder de aandacht brengen.
Gisteravond maakte ik een variant met gekookte kikkererwten en gierst. Ze waren ok. Ze zagen er prachtig uit, maar erg los van structuur en een beetje nattig. Niet goed genoeg voor het blog, dacht ik.
En toen herinnerde ik me dat ik dit jaar af en toe eens een `oud ´recept zou plaatsen. We worden overspoelt met recepten en foto´s, dus is het niet zo gek dat recepten heel snel naar de achtergrond verdwijnen, wat jammer is.
Dus als je zin hebt in knapperige, smakelijke  falafel, begin dan vanavond met het in de week zetten van de kikkererwten en maak ze morgen. Misschien wel met de glutenvrije pitabroodjes die ook wat tijd vergen, maar je bent dan toch al bezig. Ze zijn veel lekkerder dan uit de winkel!!


A weekend recipe, a golden "oldie", but so worthwhile.
Yesterday I made a variation with cooked chickpeas and  millet. It was ok. They looked great, but were a bit soggy and fell apart when eating. Not good enough for the blog I thought. But I remembered that I planned to highlight some old recipes this year and this great falafel recipe popped into my mind. These are great. Crispy on the outside and very tasty on the inside.
So please, give it a try. Start tonight with soaking the chickpeas and eat them tomorrow!!
Maybe with my gluten free pita breads. They cost some time to make, but you are already busy making the falafel. And they are so much better than store bought ones!!


vrijdag 26 mei 2017

Rabarbertaart en vanille-rabarber compote– Rhubarb torte and vanilla-rhubarb compote (GV- GF)


Terwijl AH al perziken in de aanbieding heeft (??het is mei??) heb ik van mijn biologische boer rabarber in mijn pakket gekregen. Ik ben er niet zo dol op; dat wrange vind ik niet zo lekker aan mijn tanden, maar ik heb gelukkig een paar recepten achter de hand, die goed te eten zijn ;-) Een snelle rabarbertaart met amandelmeel en een gestoofde rabarbercompote met vanille en sinaasappel.

Nodig voor de rabarbertaart:
125 g amandelmeel
75 g rietsuiker + 2 eetlepels
3 eiwitten*
1 el – 10 g maïzena
75 g boter
1 stengel rabarber in plakjes van 1 cm
1 glazen taartvorm van 20 cm Ø
* Je kunt een crème anglaise maken van de 3 eidooiers

Verwarm de oven voor op 180°C.
Leg een stuk bakpapier op de bodem van de taartvorm.
Smelt de boter en zet even apart.

Maal 75 g suiker en amandelmeel kort in een keukenmachine zodat het wat fijner van structuur wordt. Doe dit mengsel in een kom en klop er met een mixer 1 voor 1 de eiwitten door.
Voeg de maïzena toe en roer erdoor. Giet al kloppend de boter in een klein straaltje door het mengsel. Schenk het beslag in de vorm en verdeel de plakjes rabarber over de taart. Bestrooi met de 2 eetlepels suiker en schuif voorzichtig in het midden van de oven.
Bak de taart 25 minuten tot ze goudbruin is en gaar. Laat afkoelen in de vorm en snijd in 6 -8 punten.

Ik had 3 flinke stengels rabarber; met de overgebleven 2 maakte ik een heerlijke rabarbercompote door de stengels te wassen en in stukjes van 2 cm te hakken. Doe ze in een pan en voeg naar smaak suiker toe, 1 opengesneden vanilleboon en het sap van een halve sappige sinaasappel. Breng flink aan de kook en laat in 5 minuten, al roerende, zacht worden. En Klaar!


Ik eet de rabarbercompote graag met mijn ochtend havermout en wat geroosterde amandelschilfers en ook een flinke scheut room erbij, opgeklopt of niet is een fijne combi.


You need for the rhubarb torte:
125 g almond flour
75 g cane sugar + 2 tablespoon as topping
3 egg whites *
10 g – 1 tbsp corn starch
75 g butter, melted
1 stalk rhubarb in slices of 1 cm
A 20 cm Ø pie dish
* You can make a crème anglaise with the 3 egg yolks

Pre-heat the oven on 350°C.
Put a piece of baking paper on the bottom of the pie dish
Melt the butter and set aside.

In a small food processor pulse the sugar and almond flour a couple of times to make a finer texture. Transfer to a bowl.
With a hand mixer mix in the egg whites 1 at a time. Add the corn starch and pour in the melted butter slowly. Mix well.
Then pour the batter in the prepared pie dish and divide the pieces of rhubarb over the batter. Sprinkle with the remaining 2 tablespoons of sugar and bake the rhubarb pie in the middle of the oven for 25 minutes. Till golden brown.
Let the pie cool completely before cutting into 6-8 pieces.

I had 3 stalks of rhubarb and with the remaining 2 I made a delicious rhubarb compote.
Just wash the stalks and cut them into 2 cm pieces, put them in a pan and add a cut-open vanilla bean or 2 pieces of star-anise, sugar to your own taste and the juice of half a juicy orange. Bring to a firm boil, stir well for 5 minutes till the rhubarb is soft. And you’re done.


I like to eat the compote with my morning oatmeal, some toasted almond slivers and with some fresh (whipped) cream it’s really heaven!

maandag 19 september 2016

witte bonen burgers met geroosterde rode paprikasaus - white bean burgers with a red bell pepper sauce (GF-SF)


Deze heerlijke burgers vergen wat voorbereiding dus misschien een fijn recept voor het weekend. Maak er dan meteen een feestje van en rooster zoete aardappelfrites in de oven.

Voor de burgers:
160 g gare witte bonen
100 g verse witte kaas, feta of halloumi is ook lekker, maar let op het zout!
1 uitje
1 teen knoflook
1 el gember
40 g wortel
1 el bleekselderij
1 el geroosterde rode paprika
55 g havervlokken, 2 x pulsen in keukenmachine
1 tl tamari
peper en zout
1 ei

Rooster eerst de rode paprika(zie saus).

Ondertussen prepareer je de rest:
Spoel de bonen af en laat ze uitlekken in een vergiet.
Snijd de kaas in piepkleine stukjes.
Snijd ui fijn en knoflook en gember zeer fijn.
Rasp de wortel en snijd de bleekselderij in kleine blokjes.
Pulseer de havervlokken 2 x tot een grof meel.
Snijd van de geroosterde paprika 1 el in kleine blokjes.


De burgers:
Fruit ui, knoflook en gember in wat olijfolie in een kleine koekenpan en laat zeker 10, liefst 20 minuten zachtjes karameliseren. Voeg halverwege wortel en bleekselderij toe.
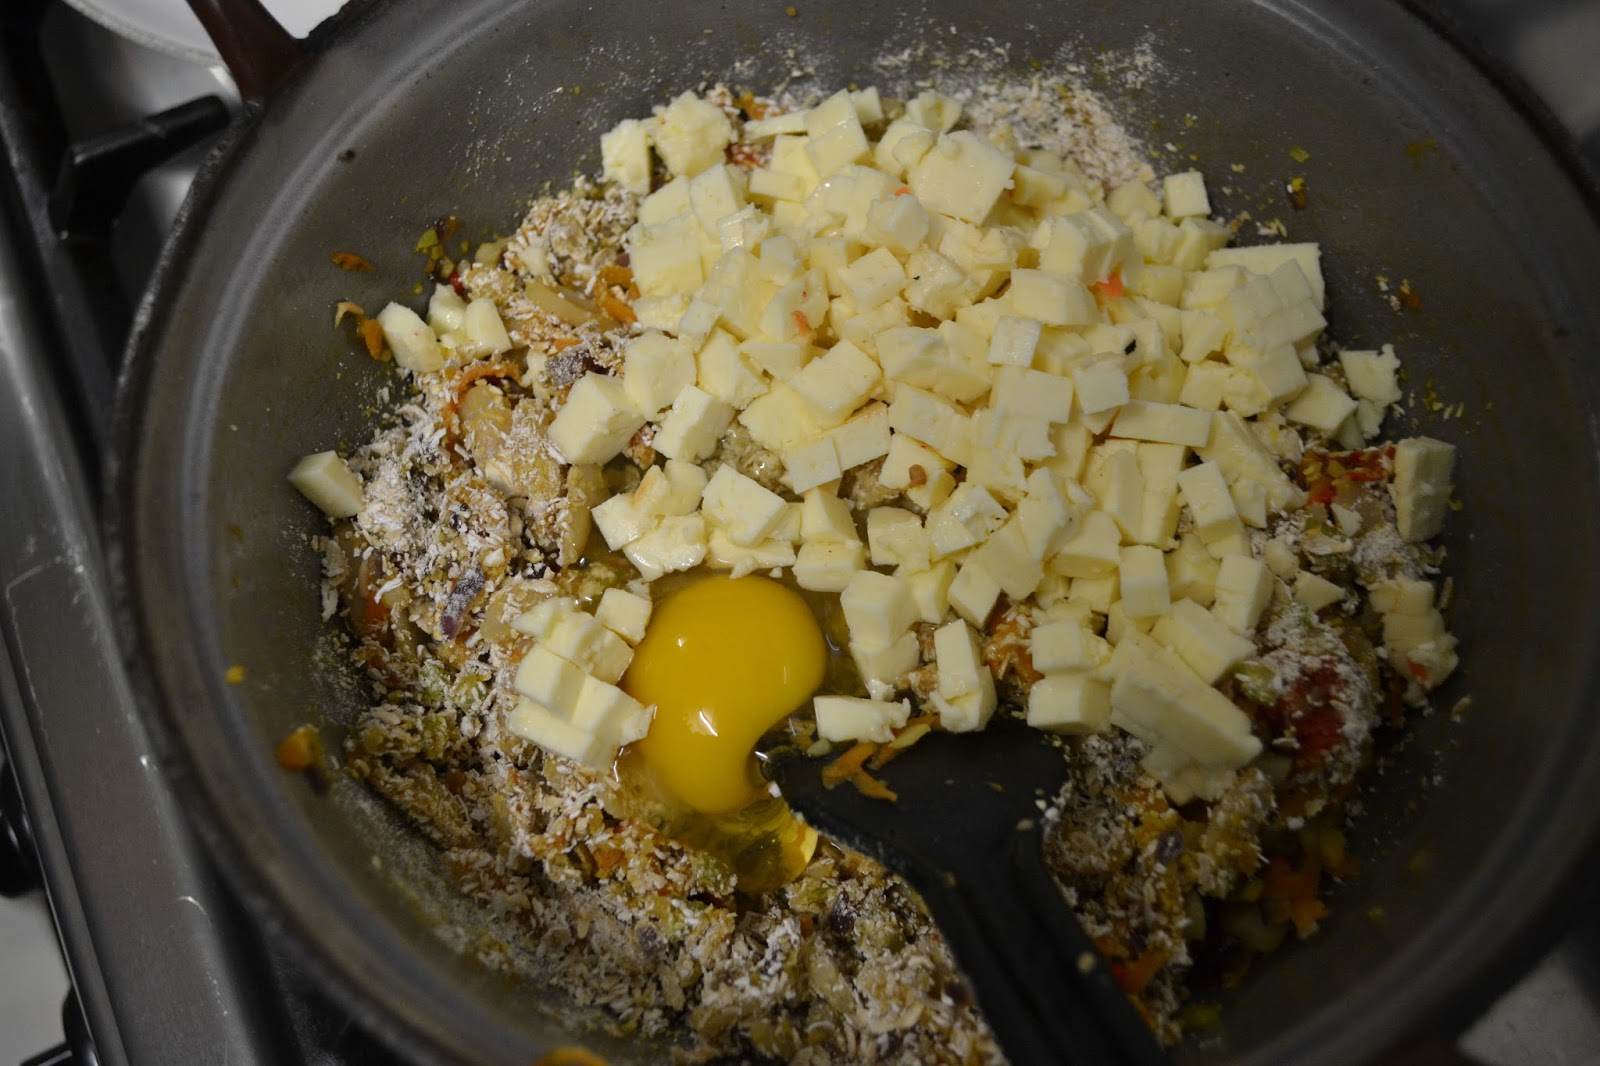
Haal van het vuur en breng op smaak met tamari, peper en zout. Voeg de havervlokken en rode paprikablokjes toe en als het mengsel genoeg is afgekoeld de kaasblokjes en het ei. Meng en vorm met natte hand 4 burgers. Leg ze op een bord en laat minimaal 1 uur opstijven in de koelkast.


Ondertussen zijn je paprika’s geroosterd en afgekoeld. Maak de saus.
Je hebt nodig:
1-2 rode paprika
zout en peper
1 tl geroosterde komijnpoeder
2 lente-uitjes
1 teentje knoflook
1 el rode wijnazijn

Rooster eerst de rode paprika op een lage gaspit of in de oven of op de BBQ tot het vel zwartgeblakerd is. Draai steeds. Doe de paprika in een papieren of plastic zak en laat wat afkoelen. Pel het vel eraf en de steelaanzet, scheur open en verwijder zaadjes en zaadlijsten. Spoel niet af, daarmee verdwijnt de smaak ook.
Pureer de paprika met de rest van de ingrediënten en proef en voeg naar smaak nog wat toe.

Verhit wat olijfolie in een anti-aanbak koekenpan en bak de burgers 5 minuten per kant tot ze mooi goudbruin zijn.
Serveer op een glutenvrijbroodje met wat rucola en de prachtige rode paprikasaus.


For the burgers:
160 g cooked white beans
100 g fresh hard white cheese, feta or halloumi will be nice too, but watch the salt!
1 onion
1 clove of garlic
1 tbsp ginger root
40 g carrot
1 tbsp celery stalk
1 tbsp roasted red pepper
55 g pulsed oat flakes
1 tsp tamari
salt and pepper
1 egg

Start with roasting your red pepper(see below):

In the meantime prepare the rest of the ingredients:
Drain the beans. Cut the fresh cheese in tiny cubes. Chop onion fine and garlic and ginger very fine.
Grate the carrot and cut the celery in tiny cubes.
Pulse oat flakes 2 times in a food processor in a coarse flour.
Dice 1 tablespoon of the roasted bell pepper into small cubes.

Prepare the burgers:
Fry onion, garlic and ginger in a little olive oil for at least 10 minutes, on very low heat. 20 minutes is even better to bring out the flavours. Add carrot and celery halfway.
From the heat add tamari, pepper and salt to your taste. Then the oat flour and bell pepper cubes. When the mixture has cooled down, add cheese cubes and the egg. Mix well and form with wet hands 4 burgers. Put them on a plate and let them set in the fridge for at least 1 hour.

In the meantime your bell peppers are done  and you can make your sauce.

You need:
1-2 red bell peppers
salt and pepper
1 tsp toasted cumin powder
2 spring onions
1 clove of garlic
1 tbsp red wine vinegar

Roast the peppers on your lowest gasflame or in the oven or on the BBQ till the skin is blackened. Turn every time. Let it cool in a paper or plastic bag. Then peel off the charred skin, tear open and remove seeds and stalk. Do not wash, the smoky taste will disappear!

Put the pepper with the rest of the ingredients in a food processor and blend into a tasty sauce. Put aside.

Heat some olive oil in a frying pan and bake the burgers 5 minutes on each side till they are golden brown.

Serve on a gluten-free bun or with some rocket and the delicious vibrant red pepper sauce!

maandag 2 maart 2015

Thaise rode curry pasta - Thai red curry paste(GF-SF-DF-V)


Deze rode curry pasta is perfect om in de koelkast te hebben staan en klaar voor gebruik in een fijne Penang curry of in een soepje. Een schepje curry pasta door je fried rice of door een omelet met wat groente geeft een enorme smaak explosie.
Gebruik rode paprika als je de pasta voor kinderen gebruikt of mensen die niet van hete pepers houden.

Je maatlepel is een Chinese soeplepel en dan ook nog eens met een kop erop.


Rode curry pasta
doe de volgende ingrediënten in de blender en maal tot een gladde pasta:

2 el rode pepers of dezelfde hoeveelheid rode paprika, kleingesneden
1 el fijngesneden kaffir lime blaadjes, nerf eruit
1 el fijngehakte galangal
1el lemongrass in ringetjes
1 el ui
1 el knoflook
1 el geroosterde en gemalen komijnzaad
½ el miso
Voeg eventueel een scheutje water toe.


Bewaar in een glazen pot in de koelkast, blijft weken goed. Volgende keer maak ik penang curry met wortelgroentes.


Thai red curry paste

Put the following ingredients in a small kitchen blender and blend into a smooth paste:
(1 tablespoon is a Chinese soup spoon with a head on it, so don’t hold back but use a big scoop)
2 tbsp of diced red chillies or the same amount of diced red bell peppers (for the kids or the no-heat loving guys)
1 tbsp of finely cut kaffir lime leaves, without stem
1 tbsp of chopped galangal
1 tbsp of lemon grass, small rings
1 tbsp of onion, chopped
1 tbsp garlic, chopped
1 tbsp toasted, ground cumin seeds
½ tbsp of miso
add some water when it's too thick


Next time I will make a very tasty penang curry with this curry paste. In the meantime you can add some to a vegetable omelette or a scoop into your plain pumpkin soup or into your fried rice.
It will keep for weeks in your fridge in a clean glass pot.

maandag 2 december 2013

Winter vegetables green Thai curry part 1

As I told you lately, I did a cooking course at Mai Kaidee in Bangkok on my last travel to Thailand. Believe it or not, but I think that Mai Kaidee is the only vegan restaurant in the whole of Buddhist Thailand!! Ok, just exaggerating a little. The fact is that fish or poultry and especially broth, which they use in almost every dish!!, don’t count as meat in Thailand. “Is this vegetarian” is not the right question; you have to ask “is there meat, fish, chicken or broth in this dish?????” So you see, that is not an easy one.

Also the Thai people are so incredibly polite and willing to help and be friendly, that they don’t like to say no, or I don’t know. So be aware of this when you visit this beautiful and amazingly friendly country.


Anyway, at Mai Kaidee you can be really sure. They serve delicious modern and traditional Thai vegan cuisine.
The cooking class was great fun, we were with 5 people and a little baby, did 10 dishes in 5 hours, we were talking, cooking, tasting, eating, dancing and singing. All inclusive!! I do recommend it, it was so enjoyable. I learnt a lot, but the most amazing thing I learned there was that Thai recipes in Holland or the internet, and probably elsewhere, talk about using 1 tablespoon of this and that, but the tablespoons they use at Mai Kaidee are much bigger, say 2 sizes; they use these ones


You can imagine that this creates a much bigger taste!
Thai kitchen is easy, quick and healthy. Preparation time is the most time consuming, but with a little music on the side and a smile on your face, preparing becomes fun and when it’s time to cook, everything is ready in a sec! Even my beloved C. is converted to Thai cooking now, and cooks it every 2 days or more. He even lost some excess weight (just a little, don’t worry)!!

Today I give you 2 versions of the Green Chili Paste of Mai Kaidee: 1 is the original and 2 is the version I made for children and other people who don’t like heat, without the chilies but with the same maximum taste.
The paste keeps well in a clean glass pot in the fridge for up to 2 weeks or even more.

Mai Kaidee’s Green Chili Paste

Blend the following ingredients with a mortar and pestle or in a blender:

2 tbsp green chilies, about 10 Thai chilies, chopped up, with seeds and all
1 tbsp kaffir lime leaf, I use frozen, tear the stems out and cut up fine
1 tbsp galangal, slices unpeeled
1 tbsp lemon grass, outer leaves discarded, inner softer part in small rings
1 tbsp onion, cut roughly
1 tbsp garlic, cut fine
1 tbsp cumin powder
½ tbsp of miso

                                  (picture found on Google images)


My child-friendly chili paste

2 tbsp or ½ green bell pepper, cleaned and deseeded, chopped roughly
And the same ingredients as above: 1 tbsp each of
Kaffir lime leaves
Galangal
Lemon grass
Onion
Garlic
Cumin powder
½ tbsp of miso

Next post will be the lovely winter root vegetables green curry I made with this chili paste!!

See you soon.

dinsdag 16 april 2013

Miso spice paste/ bumbu– miso kruidenpasta/boemboe (GF-DF-SF-V)


I often make this beautiful spice paste or bumbu. The best thing about it is the taste, obviously, but after that it is so easy to make and it’s so versatile, you can make it up to your own desires. Like for my son I leave out the chilies, because he doesn’t like hot. For me I add green chilies or red, just according to the dish or my particular taste that day.

You can use the paste in any noodle soup, but it is also very good in stir-fry vegetable dishes or other Asian food. Just give it a try and see what you think of it.

Just beware of the fact that you buy a certified gluten-free miso, some are made of barley or wheat and even when you buy a rice-based miso there is a possibility of traces of gluten through cross-contamination!

Miso spice paste

6 candlenuts
1 small onion, chopped roughly or 1-2 spring onions
3 tbsp chopped garlic
3 tbsp fresh ginger root, peeled and chopped roughly or for a more explicit taste use galangal root or a mixture of the 2
1 big kaffir lime leave
1 tsp lime or lemon zest
chilies to your taste, red/green, deseeded or not
1 tsp coriander seeds
2 tbsp coriander stalks
1 big tbsp of rice miso

Put everything in a kitchen machine and blend to a smooth paste or use the mortar and pestle and grind to a more rustic paste.
Heat some oil in a wok and bake the paste( about 1 big spoonful a person) for a minute before adding the rest of your ingredients, like vegetables, coconut milk and noodles.

You can keep the paste for a couple of days in a closed pot or freeze it. The best is to make it and immediately use it all!!


Miso-kruidenpasta of boemboe

6 kemirinoten
1 klein uitje of 2 lente-uitjes, grof gehakt
3 el grofgehakte knoflook
3 el verse gemberwortel, geschild en grof gehakt of gebruik eens galangal voor een meer uitgesproken smaak of een combinatie van beiden
1 groot kaffir lime blad
1 tl citroen- of limoenrasp
pepers, naar smaak, rood/groen, met of zonder zaadlijsten
1 tl korianderzaad
2 el gehakte korianderstengels
1 grote el rijstmiso

Doe alles in een keukenmachine en maal tot een zachte pasta of gebruik de vijzel en doe het met de hand voor een meer grove boemboe.
Verwarm wat olie in de wok en bak de pasta ( 1 flinke eetlepel per persoon) even 1 minuut aan voor je de rest van de ingrediënten toevoegt: groentes, kokosmelk, noedels bijvoorbeeld.

Je kan de boemboe een dag of 2 bewaren in een gesloten pot of invriezen.
Het lekkerst is maken en meteen gebruiken!!

vrijdag 30 september 2011

pear chutney with walnuts - perenchutney met walnoten (GF-DF-SF)


It’s harvest time. Apples, pears, nuts, pumpkins, when you store them well you can keep these products all winter. That is also the nice thing about preserving. You can preserve the summer in a pot and use the sun energy when you need it the most! Especially after a non-summer like this year. That is why using canned tomatoes is such a good idea when there are none growing any more (or they must be shipped or flown from the other side of the world). They come from sunny Italy and they always taste better then a winter tomato from Holland, looking blushy and perfect, tasting nothing.

Back to the pears.
My father( 72) works together with a group of pensionados, they prune and keep up old orchards and in that way they help to preserve old apple and pear varieties. In exchange they can pick the fruit and once a year there is a market where they make fresh juices and sell all these varieties to the public. It’s a great group, they keep fit, by working out in the open, they have fun together and they do a great job.
Around this time a year my house smells like an orchard, every time my parents come around, with baskets full of juicy freshly picked apples and pears.
From the pears I made this lovely chutney.


Pear chutney with walnuts(1 pot)
2 pears
1 tbsp good olive oil
½-1 eschalotte, finely chopped
1 clove of garlic, minced
Some sprigs of lemon thyme
2 tbsp of nice flavored vinegar
2 tbsp date syrup
pepper and salt
6 walnuts, shelled and chopped coarsely

Warm the olive oil in a small sauce pan and softly sweat the onion, garlic and lemon thyme for 8 minutes.
Then add the vinegar, date syrup and pepper and salt to your taste.
Peel and chop the pears in small chunks and add to the liquid.
Cook softly for 30 minutes. Add the walnuts the last 5 minutes.
Eat with some gluten free toast and soft goats’ cheese.


Perenchutney met walnoten(1 potje)
2 peren
1 el goede olijfolie
½ -1 sjalotje, fijngesnipperd
1 teen knoflook, zeer fijn gesnipperd
wat takjes citroentijm
2 el lekkere azijn
2 el dadelsiroop
peper en zout naar smaak
6 walnoten, grofgehakt

Verwarm de olijfolie in een steelpan en smoor de ui, knoflook en citroentijm zachtjes, ongeveer 8 minuten.
Voeg dan de azijn, dadelstroop en peper en zout toe.
Schil de peren en hak in kleine stukjes en voeg aan het mengsel toe.
Laat heel zachtjes 30 minuten koken.
Voeg de laatste 5 minuten de gehakte walnoten toe.
Laat afkoelen en bewaar in een schone pot in de koelkast.
Heerlijk met een glutenvrije cracker en wat zachte geitenkaas!

vrijdag 17 juni 2011

saumon a l'oseille - zalm in zuringsaus (GF-SF)

I made this lovely salmon dish the other night.
My sorrel is growing very fast, so before it’s going to flower I decided to make sorrel sauce. And yes, the best way is with fish and a new potato. Simple and rich.

Sorrel sauce (2 pers)

a handful of sorrel leaves
75 ml of crème fraiche
20 g butter
salt and pepper to taste

Warm the crème fraiche and the butter in a small saucepan, together with the finely chopped sorrel and pepper and salt to your own taste. Let it simmer, but not to long, you’ll see the sauce getting some pinkish colour, taste and serve on a piece of seared or poached salmon with cooked new potatoes.


Zuringsaus (2 pers)

een handvol zuringblaadjes
75 ml crème fraiche
20 g boter
zout en peper naar smaak

Verwarm de crème fraiche en de boter, samen met de fijngehakte zuringblaadjes. Voeg peper en zout naar smaak toe. Laat het even rustig sudderen tot je de kleur ziet veranderen tot zacht-roze. Proef en serveer op een mooi stukje gebakken of gepocheerde zalm met een kruimige nieuwe aardappel.

donderdag 9 juni 2011

Walnutpesto - walnootpesto (GF-DF-SF)


This pesto was part of the catering I told you about.
Like every pesto I make them by hand, I love to see things changing and the smell is great when using a mortar and pestle. It’s the alchemy of cooking.

The pesto is very nice on a piece of bread or cracker and when you like you can shave some parmesan on top of it. It makes the pesto more round. The walnuts are drier then pine nuts, so use enough tasty olive oil to smoothen it.
But as a quick and simple pesto for your pasta it will be great too!

Meanwhile I made a lot of new recipes from other (gluten free) bloggers. It is so inspiring, I always have to be aware that my household is small and that we don’t eat that much.
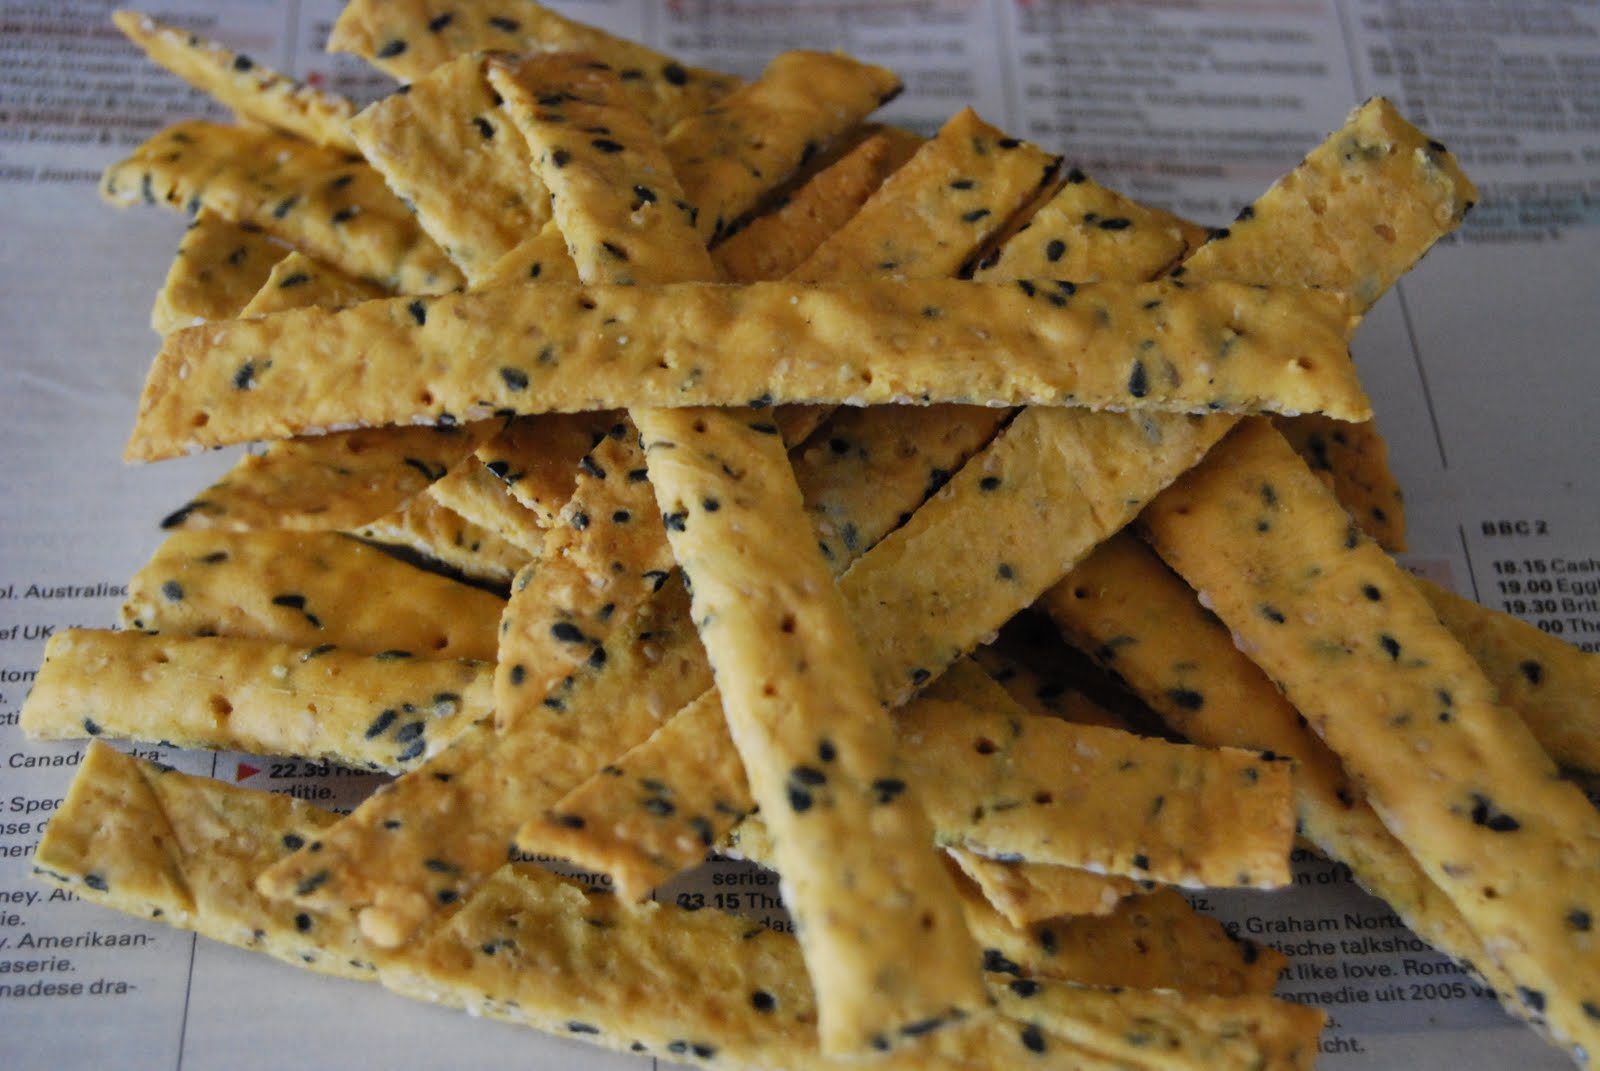
I made these great crackers from chickpea flour, they are so good! Thank you Anja!

Also I’m working a lot in the picking garden and that inspires me to go out in nature and pick all sorts of things like nettles (I made an infusion to drink, full of calcium!), elderberry flowers ( I made syrup, really yummie, recipe follows), calendula from my own small garden, strawberries (for jam).


After a long dry period we have quiet some rain lately and that’s great for my balcony zucchini:


Walnut pesto
140 g unshelled walnuts
25 g flat parsley leaves
1-2 cloves of garlic (depending on size and taste), chopped roughly
2 tbsp of capers, chopped
1,75 dl extra virgin olive oil
salt and pepper
parmesan if you like

Dry-roast the walnuts briefly in a frying pan. Chop them up roughly and put them in the mortar together with the garlic, some salt and the parsley leaves. Puree by hand.
Than add the capers, olive oil and salt and pepper to taste.
That’s it, easy. You also can use the food processor ;)

Walnootpesto
140 g gedopte walnoten
25 g platte peterselieblaadjes
1-2 tenen knoflook, grof gehakt
2 el kappertjes
1,75 dl extra vergine olijfolie

Rooster de walnoten kort en droog in een koekenpan met dikke bodem.
Hak ze grof en vijzel ze samen met de knoflook, snufje zout en de peterselieblaadjes tot een mooie puree.
Voeg dan de kappertjes toe en al roerend de olijfolie en peper en zout naar smaak.
Snel en gemakkelijk of als je nog sneller wilt: doe alles in een keukenmachine en hup, klaar!
Dan mis je alleen de sensatie van de geurexplosie die je krijgt als je met de hand vijzelt!!

zaterdag 30 april 2011

Apricot chutney – Abrikozenchutney (GF- DF-SF)


The cherry on the cake: very nice on top of a sesame cracker with some labneh cheese is this very easy and quick apricot chutney.
It is raw and when you use unsulfured apricots very healthy too. Dried apricots are a natural and gluten free source of Vitamin E, iron, magnesium and fibers.
I found the recipe in Home Made, a delicious cookbook by the Dutch Yvette van Boven.

Apricot chutney
250 g dried, unsulfured apricots, welled 2 hours
2 sprigs of rosemary, chop the leaves
1 small clove of garlic
Juice of half a lemon
100 ml extra vergine olive oil
Pepper from the mill

Grind all ingredients in a food processor. Not too finely!
With a small layer of oil on top you can keep the chutney in the fridge for a long time!!
Enjoy!


Abrikozenchutney
250 g gedroogde, ongezwavelde abrikozen, 2 uur geweld
2 takjes rozemarijn, fijngehakt
1 klein teentje knoflook
Sap van een halve citroen
100 ml extra vergine olijfolie
Peper uit de molen

Maal alle ingrediënten in een keukenmachine. Niet tè fijn!
Met een laagje olie erop kan je de chutney in de koelkast vrij lang bewaren.
Heerlijk op een sesamcracker met wat labnehkaas!!

donderdag 7 april 2011

Madame Jeanette sambal (GF-DF-SF)


Yesterday I was pretty busy. (today I'm too busy)
After my morning yoga and breakfast I had to do something about my blog because previously I made some random, I thought to experiment a little, changes, but forgot how to reset everything!
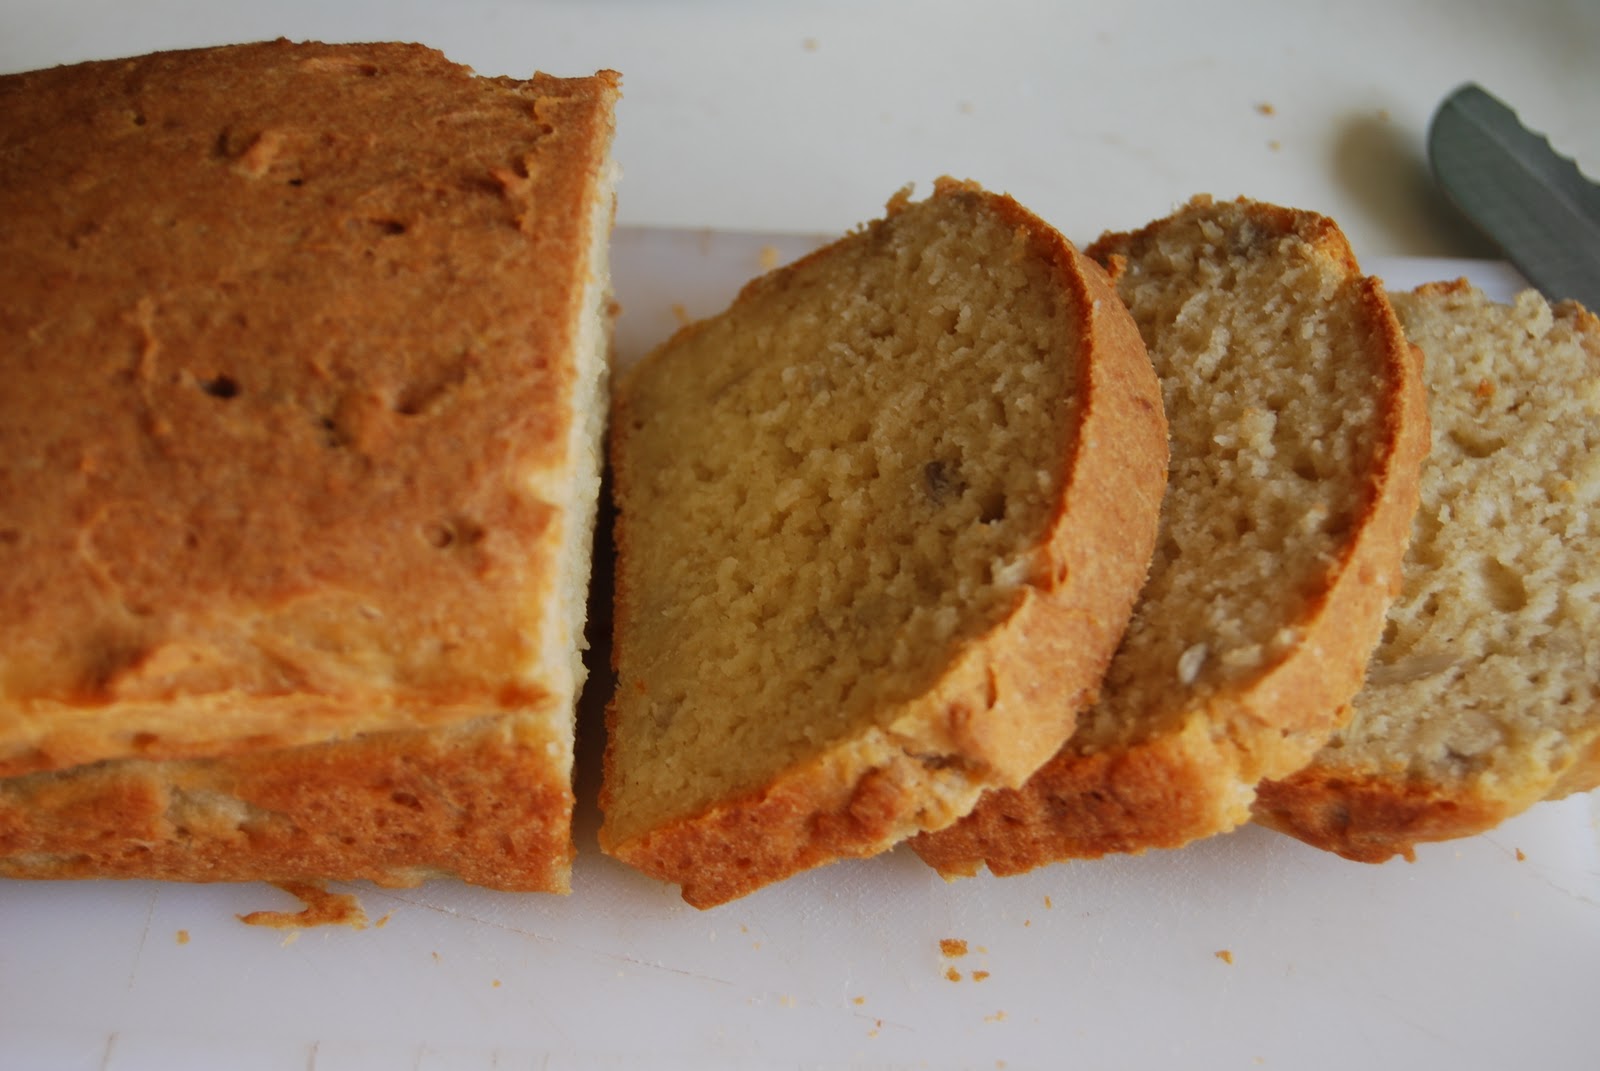
It’s not yet quite the way I want it to be, but I wanted to bake something too. Coming time I really have to do some updating; I’m not so keen doing it, spending so much time behind my computer. I’d rather be in the kitchen. So I went baking instead of blogging; I made these wonderful muffins and a sunflower seed bread.


For the muffins I link you to Karina’s Kitchen, read her story and recognize or sympathize!
Yes, it’s a long time ago that I felt the same, but still it happens once in a while and sometimes you just boil over from all this stupidity. By the way, I love her way of writing and her blog too (as you already knew, I think). I made some changes to the ingredients, because I didn’t have everything by hand. Thank you, Karina!!


The bread I made comes from this book and I give you her homepage too. It is quite delicious; I put in much more sunflower seeds (100g) and instead of sugar I used a tablespoon of honey

Today I made sambar powder, sambar, coconut chutney and tonight I’m gonna eat these with some idlis. I’m ready to inaugurate my personalized, yes you read it well!!, idli steamer.


I’ll show you the pictures later, and the recipes of course.

There is a Surinam – Hindustan supermarket in my neighborhood and they sell amazing products from around the globe, there I always find some nice and fresh ingredients for my Indian cooking; today I found freshly grated coconut from Cochin (frozen). And it’s so nice chatting to the wife of the owner about food (of course) and cooking.

Talking about Surinam food: tomorrow I’m eating at my friend M; she’ll be making bakkeljauw, salted dry fish, the Surinam way, with boiled sweet potato and tayer leaves.
For her I made this very simple chili paste or sambal from Madame Jeanette peppers, very hot, but with a very delicate taste.


Chop 4 Madame Jeanettes coarsely (be careful or use gloves) and put them in a food processor, together with half a teaspoon of salt and a teaspoon of tamarind paste.
Blend.

vrijdag 24 september 2010

druivenchutney

O. barst van de druiven. Hij geeft ze met kilo’s tegelijk weg en nog is het einde niet zicht.
Ze zijn mini, prachtig donkerpaars en superzoet.
Ik eet me ook te barsten en besluit van de rest iets lekkers te maken.
De zon in een potje, altijd lekker nu het wat killer wordt en weer eens tijd voor een goed glas wijn, een stukje pittige kaas en…chutney daarbij. Dat is zoo lekker!
Druivenchutney, van O. dus!

Druivenchutney (1 potje)

1 klein uitje of sjalotje, fijngesnipperd
1 teentje knoflook, fijngehakt
1 stukje gemberwortel, grootte van knoflookteen, fijngesneden
2 el olijfolie
600-700ml druiven, kleintjes heel laten, grote halveren
beetje chiliflakes, naar smaak
snufje zout, naar smaak
1 el dadelsiroop
1 el rijstazijn
(1 scheutje port of niet)

Fruit het uitje, de knoflook en de gember zachtjes in de olijfolie.
Na een minuut of 4 doe je de rest van de ingrediënten erbij en brengt alles aan de kook.
Laat net zo lang inkoken (zeker 30 minuten) tot je een dikke kleverige saus hebt: druivenchutney dus!
Related Posts Plugin for WordPress, Blogger...