Posts tonen met het label knoflook. Alle posts tonen

vrijdag 2 juni 2017

Tuinmelde omelet op Catalaanse wijze – Catalan style omelette of orache and raisins (GF-DF-SF)


Deze week zat er een grote zak lichtgroene tuinmelde in mijn biologische groentepakket.
Ik begrijp dat er verschillende kleuren bestaan; op mijn moestuin groeit spontaan rode tuinmelde, prachtig om te zien.

     rode tuinmelde in de moestuin van Yvon vorig jaar

Je kunt de blaadjes als ze nog jong zijn in een salade eten en als ze wat groter zijn stoven als spinazie. De smaak is zacht en niet zo uitgesproken. Vandaag maakte ik een omelet met gestoofde tuinmelde op Catalaanse wijze.
Als je geen tuinmelde hebt kun je ook spinazie of snijbiet gebruiken.

Nodig:
450 g tuinmelde
2 dikke tenen knoflook
Peper en zout
Handje rozijnen
Handje pijnboompitten of gehakte pecannoten (mijn zoon reageert allergisch op pijnboompitten, helaas)
3 eieren
20 cm Ø koekenpan

Hoe:
Ris de blaadjes van de stelen en was de melde goed. Laat een beetje uitdruppen. Hak de knoflooktenen grof.

Giet een scheut olijfolie in de koekenpan en laat heet worden; bak de knoflooktenen snel en voeg de melde met aanhangend water toe. Roer op hoog vuur tot de blaadjes beginnen te slinken. Zet het vuur lager en breng op smaak met peper en zout en voeg de rozijnen toe. Laat nog een paar minuten stoven tot alle blaadjes zacht zijn. Laat 15 minuten afkoelen in een kom. Was de koekenpan met heet water.

Voeg de eieren en de noten toe aan de melde-rozijnen mix en roer goed door elkaar. Zout en peper naar smaak.

Giet royaal olijfolie in de koekenpan en laat weer heet worden. Voeg in 1 keer de meldemix toe en druk plat met een spatel. Zet het vuur laag en laat zachtjes goudbruin bakken, de onderkant dus. Zet dan een passend deksel of bord op de koekenpan en keer in 1 keer de pan met deksel/bord om. Gebruik eventueel een ovenhandschoen zodat je je niet verbrand! Laat de omelet terugglijden in de pan en bak de andere kant nog 2-3 minuten.

Eet warm of koud, allebei lekker. Ook op brood!

Ik eet er vanavond een kom wortel-linzensoep bij en zelfgemaakte guacamole met tortillachips. Ik hoop dat je geïnspireerd bent.


This week there was a big bag of light green orache in my organic vegetable box. I understand that there are different colours of orache, all edible; in my vegetable garden there grows a deep red orache spontaneously.
You can eat the young leaves in a salad and when they grow bigger stew them just like spinach. The taste is soft and not very distinct. Today I made this omelette the Catalan way, with garlic and raisins. When you don't have orache you can use spinach or Swiss chard instead.


You need:
450 g of orache
2 fat cloves of garlic
Pepper and salt
1 handful of raisins
1 handful of pine nuts or chopped pecan nuts (my son is allergic to pine nuts lately unfortunately)
3 eggs
20 cm Ø frying pan

How to:
Tore the leaves from the stems and wash them; drain a bit.
Chop the garlic cloves roughly.

Heat a tablespoon of olive oil in a ( non-stick) frying pan and fry the garlic on high heat for 1 minute. Add the slightly wet orache leaves and stir well till the leaves start to wilt. Season with salt and pepper, add the raisins and slowly bake till all the leaves are wilted, stir on. Scoop into a bowl and let the mixture cool for 15 minutes. Add the eggs and the nuts. Stir everything well.

In the meantime clean the frying pan with hot water, put on the fire again with a generous amount of olive oil till pretty hot and add the orache-egg mixture. With a spatula press the mixture down, lower the gas and let it cook till the bottom is golden brown. Turn the omelette by putting a fitting plate or lid on top and turn the pan upside down. Maybe use oven mittens in order to not burn yourself!Let the omelette glide back in the pan and bake the other side for 2-3 minutes more.

Eat hot or cold. Both are delicious.


We have a very hot day here so I eat the omelette with a green salad, some guacamole with tortilla chips and a bowl of carrot-lentil soup. I hope you like it.

zondag 13 juli 2014

Summer vegetable tian – zomergroente tian (GF-DF-SF-V)


This classic Provencal oven dish is called a tian, named after the earthenware pot which is used to give the dish its distinct flavour. But you can also use another type of oven dish.
The tian is filled with the rich flavours of courgette, aubergine and tomato, summer flavours, enhanced by a persillade, a mixture of garlic, basil and parsley and a good splash of extra virgin olive oil.

You can prepare the dish in the morning, so you just have to put it in the oven in the evening. It’s a light dish, which you can eat with a piece of fish or an omelette and some salad. The next day, you can eat the left-overs, if there are any, cold, as an anti-pasta.

I am quite busy in my garden right now and the vegetables are growing so hard, as well as all the wild flowers and uninvited plants, which we call weeds. There is a lot to weed now!!

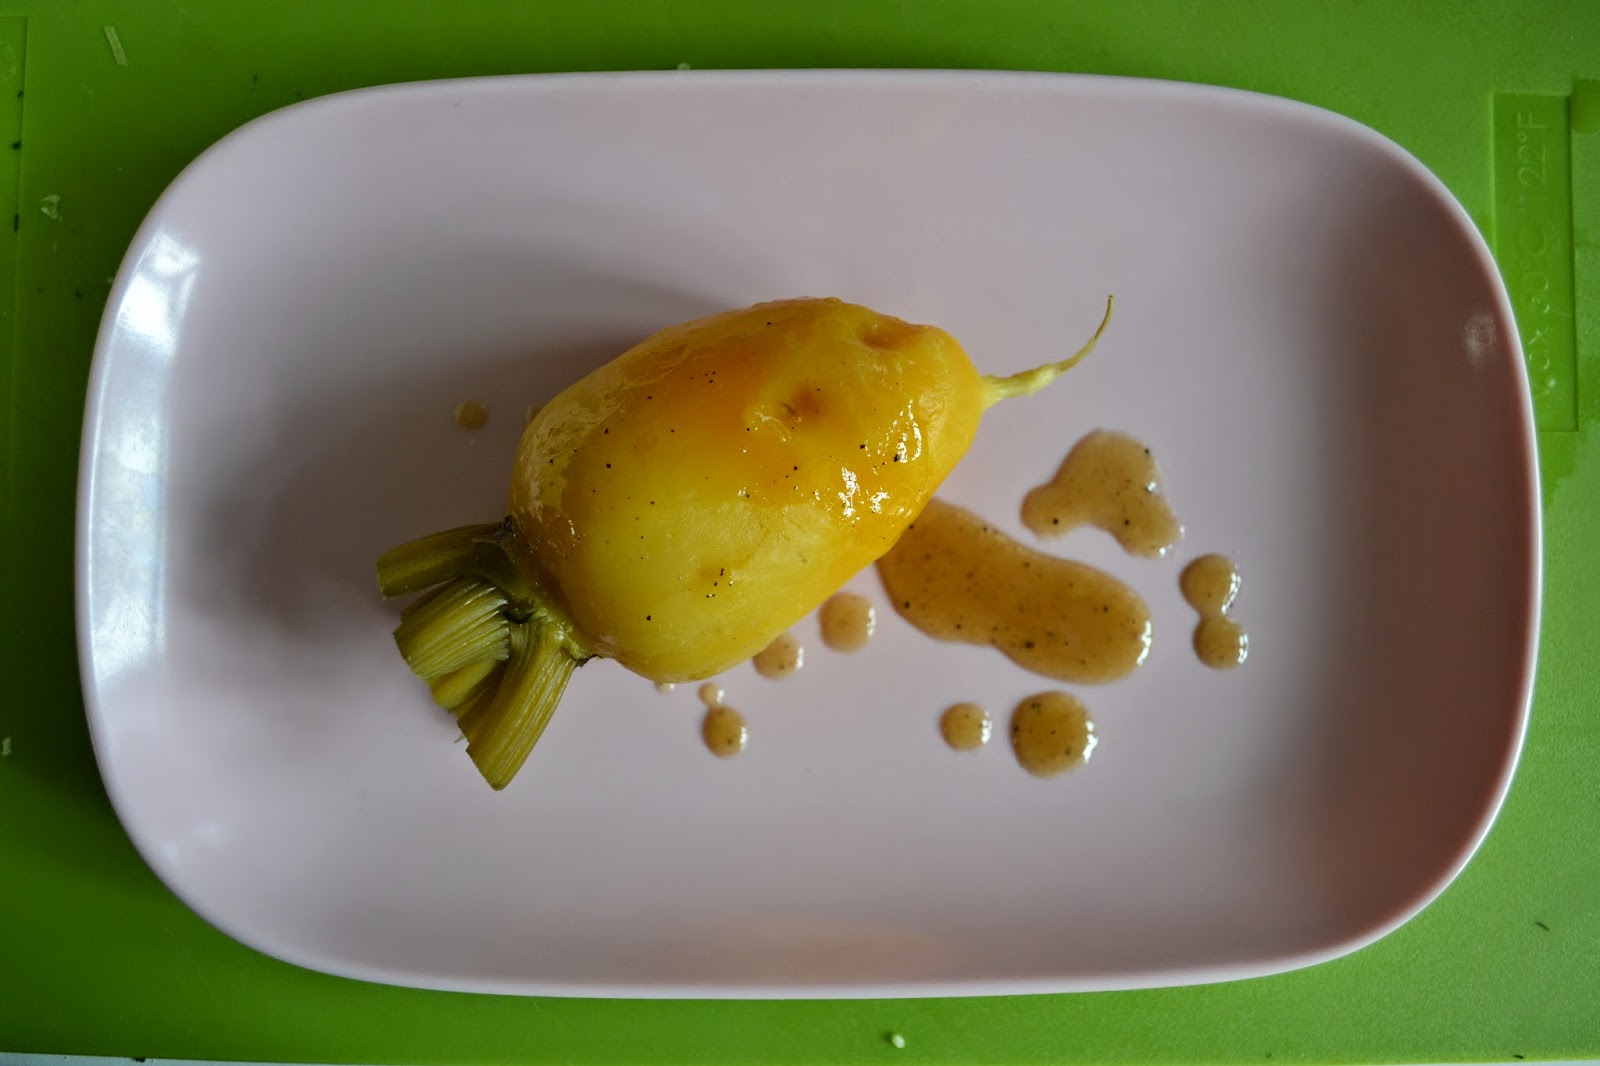
Every time I go there it amazes me that out of a tiny seed, such richness can grow. I adore my garden, go there almost every day, just to be there, to work a bit and take some lovely vegetables home to cook. Like this beautiful Golden Burpee. I cooked it, peeled it, sliced it and ate it with just a bit of dressing, wow! Heaven!!


For the tian recipe (2-3 pers) we need:

1 medium aubergine/ eggplant
2 medium courgettes/zucchini
2 big juicy tomatoes
½ cup chopped parsley
¼ cup chopped basil
2-4 cloves of garlic, finely choppped
Pepper
Sea salt

I like to slice my vegetables fine, 3-4mm, because then you can make a lot of layers which will melt in your mouth after baking.

When you are going to bake the dish after preparation, pre heat the oven now on 160°C.

First we slice the aubergine/eggplant. Lightly salt the slices and place them in a colander for 30 minutes, so the moisture can release. Rinse them quickly and dry with paper or cloth towel.

In the meantime you make the persillade: chop garlic, parsley and basil very fine and mix together. Set apart.

Slice zucchini and tomatoes.

Take a stone/ovenware dish and brush lightly with some olive oil and begin layering the vegetables:

1 layer of tomatoes, 2 layers of zucchini, 1 layer of eggplant, sprinkle with some persillade and pepper and salt. Then repeat until you used all of the ingredients. 
Drizzle generously with olive oil.
Bake the tian in the oven for 1 hour and 15-30 minutes, till the vegetables feel tender when you pierce them with a fork.

Make sure that the vegetables don’t brown too quickly, by checking them regularly and if so, place a lid or a piece of aluminium foil on top.


Voor de tian (2-3 pers) hebben we het volgende nodig:

1 medium aubergine
2 medium courgettes
2 flinke sappige tomaten
½ kop fijngehakte peterselie
¼ kop fijngehakte basilicum
2-4 tenen knoflook, fijngesneden
Peper
zeezout

Ik hou ervan om mijn groentes vrij fijn, 3-4mm, te snijden, zodat ik veel lagen kan maken en ze uiteindelijk op je tong smelten na het bakken.

Als je het gerecht meteen wilt bakken verwarm dan nu de oven voor op 160°C.

Snijd eerst de aubergine en leg ze in een vergiet, besprenkel ze licht met wat zout en laat 30 minuten staan zodat de sappen eruit komen. Spoel ze snel af en droog met theedoek of keukenpapier.

Ondertussen maak je de persillade: hak de knoflookteentjes, peterselie en basilicum fijn en meng door elkaar. Zet apart.

Snijd courgettes en tomaten.

Olie de ovenschaal licht in met wat olijfolie en begin dan met de lagen in de volgende volgorde: 1 laag tomaat, 2 lagen courgette, 1 laag aubergine, besprenkel met wat persillade en peper en zout en ga zo door tot alles is opgebruikt. 
Besprenkel royaal met olijfolie en bak de tian in het midden van de oven, 1 uur en 15-30 minuten, tot de groentes zacht zijn als je erin prikt met een vork.


Mocht het gerecht te hard bakken en te bruin worden, leg dan een stuk aluminiumfolie of een deksel op de schaal.


dinsdag 16 april 2013

Miso spice paste/ bumbu– miso kruidenpasta/boemboe (GF-DF-SF-V)


I often make this beautiful spice paste or bumbu. The best thing about it is the taste, obviously, but after that it is so easy to make and it’s so versatile, you can make it up to your own desires. Like for my son I leave out the chilies, because he doesn’t like hot. For me I add green chilies or red, just according to the dish or my particular taste that day.

You can use the paste in any noodle soup, but it is also very good in stir-fry vegetable dishes or other Asian food. Just give it a try and see what you think of it.

Just beware of the fact that you buy a certified gluten-free miso, some are made of barley or wheat and even when you buy a rice-based miso there is a possibility of traces of gluten through cross-contamination!

Miso spice paste

6 candlenuts
1 small onion, chopped roughly or 1-2 spring onions
3 tbsp chopped garlic
3 tbsp fresh ginger root, peeled and chopped roughly or for a more explicit taste use galangal root or a mixture of the 2
1 big kaffir lime leave
1 tsp lime or lemon zest
chilies to your taste, red/green, deseeded or not
1 tsp coriander seeds
2 tbsp coriander stalks
1 big tbsp of rice miso

Put everything in a kitchen machine and blend to a smooth paste or use the mortar and pestle and grind to a more rustic paste.
Heat some oil in a wok and bake the paste( about 1 big spoonful a person) for a minute before adding the rest of your ingredients, like vegetables, coconut milk and noodles.

You can keep the paste for a couple of days in a closed pot or freeze it. The best is to make it and immediately use it all!!


Miso-kruidenpasta of boemboe

6 kemirinoten
1 klein uitje of 2 lente-uitjes, grof gehakt
3 el grofgehakte knoflook
3 el verse gemberwortel, geschild en grof gehakt of gebruik eens galangal voor een meer uitgesproken smaak of een combinatie van beiden
1 groot kaffir lime blad
1 tl citroen- of limoenrasp
pepers, naar smaak, rood/groen, met of zonder zaadlijsten
1 tl korianderzaad
2 el gehakte korianderstengels
1 grote el rijstmiso

Doe alles in een keukenmachine en maal tot een zachte pasta of gebruik de vijzel en doe het met de hand voor een meer grove boemboe.
Verwarm wat olie in de wok en bak de pasta ( 1 flinke eetlepel per persoon) even 1 minuut aan voor je de rest van de ingrediënten toevoegt: groentes, kokosmelk, noedels bijvoorbeeld.

Je kan de boemboe een dag of 2 bewaren in een gesloten pot of invriezen.
Het lekkerst is maken en meteen gebruiken!!

dinsdag 19 februari 2013

acar ketimun - atjar ketimoen - cucumber pickle(GF-DF-V)


I am in an experimenting mood, in my mind that is;  although I cook every day, I am mainly thinking about, rethinking, rereading, planning, organizing, writing, rewriting my recipes. Putting things together in a blogpost is the last thing I think about. 
It is not the time that is lacking, or the drive. It's the time of year, I am in winter modus, the time for evaluating: What is ok, what is not, what do I want to share and what not, what is healthy and why do i care, etc.
Maybe it's a case of writers'block, maybe it's just the springtime I am waiting for, the renewal of the senses, of nature awakening, of fresh smells and new greens, the sprouting of the young leaves the awakening of creativity again. Sigh! Maybe!

That's why I am putting a lot of things in pots, not only literally; like pickles or seeds to sprout, what happens inside? I am experimenting with a bread from My New Roots; I am making pickles to boost my digestion, I made a turmeric paste to make golden milk with home made almond milk, as well  to stimulate and ease my belly.

Last week I made this easy cucumber pickle, it's a classic from the Indonesian kitchen.

Atjar/acar ketimoen is cucumber pickle, easy to make, easy to keep and really refreshing and tinglingly acid when you eat it. As a side  with a rice dish, in a sushi roll or on a sandwich. 


Atjar ketimoen

1 cucumber
2dl vinegar
pinch of salt
1 tsp gula djawa or palm sugar
3 cm piece of fresh ginger, finely cut
6 peppercorns
2 coves of garlic, fine

Wash and halve the cucumber lengthwise.
You can deseed the cucumber so you get this nice half moon shapes, but I don’t bother I like the seeds too. Cut the halves in small slices. Put them in a bowl and set aside.

Cook the vinegar with the rest of the ingredients for some minutes, than strain through a sieve and let it cool. Add to the cucumber and leave it in the fridge for at least an hour before serving. You can also put everything in a sterilized pot with lid. Keep in the fridge for at least 2 weeks!


Atjar ketimoen

1 komkommer
2 dl azijn
 1tl gula djawa of rietsuiker
3 cm stuk verse gember, fijngesneden
6 peperkorrels
2 knoflooktenen

Was en halveer de komkommer in de lengte.
Je kunt de zaadjes eruit scheppen zodat je de komkommer in mooie halve maantjes kunt snijden. Hoeft niet, ik hou wel van de zaadjes. Snijd de komkommerhelften in dunne plakjes en doe ze in een schone of kom of pot en zet apart.

Kook dan de azijn met de rest van de ingrediënten enkele minuten, zeef het vocht en laat afkoelen. Giet dan bij de komkommer en laat zeker 1 uur in de koelkast trekken voor je de atjar serveert. Je kunt hem ook in een gesteriliseerde pot met deksel gieten en bewaren in de koelkast. Blijft zeker 2 weken goed!


dinsdag 12 februari 2013

Almond-parsley pesto – amandel-peterselie pesto (GF-DF-SF-V)

As promised:

This wintery pesto is a delicious alternative for the classis one with basil. I don’t bother to buy basil in winter, because it’s not as tasty as in the summer. It needs sun and warmth, like me!!

You can see those warehouse-grown basil plants in the supermarket, also organic, but it’s not the same at all, they are a little ill-looking and you cannot keep them, they shrink or rot when you touch them or even look at them and just smell them they don’t smell as good as in summer, a bit feeble a bit sick.

The best thing you can do is to make small batches of the real stuff in the summer and freeze them, so you can have this sunny, summer flavor in winter whenever you like.
Or, make this one, it’s great too!!

Almond-parsley pesto

1 clove of garlic, roughly chopped
1 small tsp coarse sea salt
2 tbsp whole almonds, lightly roasted in a pan
1 cup tightly packed, washed and cut parsley, roughly chopped
60 ml first pressing olive oil
freshly ground black pepper

You’ll need a mortar and pestle for this or a small food processor or stick blender will work too. I love working with my hands, that gives me the pleasure of really hand-making it. In a machine you can add everything, put it on for some seconds and you’re done, ok!
For the hand method you’ll need some muscle.

Grind/pound the garlic with the sea salt till it forms a paste. Add the lightly roasted whole almonds and pound and pound till a rough mixture forms. This is a good work-out, so change hands once in while!
Add the parley bit by bit while you keep on grinding, pounding, etc.
Add the olive oil too bit by bit, while you keep up the work-out.
When you are happy with the result, with a little bite fro the almonds, grind some black pepper above the bowl and taste. It must taste and smell divine!


Peterselie-amandel pesto

1 teen knoflook, grofgehakt
1 kleine tl grof zeezout
2 el hele amandelen, lichtgeroosterd in een koekenpan
1 flinke kop, 2  handenvol peterselie, grofgehakt
60 ml eerste persing olijfolie
versgemalen zwarte peper

Als je de pesto in een keukenmachine wilt maken gooi je gewoon alle ingrediënten erin en maal enkele seconden tot de pesto klaar is.


In de vijzel:
Vijzel de knoflook samen met het zeezout tot een gladde pasta.
Voeg dan de licht geroosterde amandelen tot en vijzel ze, goed voor de spieren, wissel je hand af en toe af, tot een grofkorrelig geheel. Voeg dan beetje voor beetje de peterselie toe terwijl je blijft vijzelen en dan de olie, scheut voor scheut. Als de pesto naar je zin is, met een licht bite van de amandelen, proef en voeg naar smaak versgemalen zwarte peper toe.
Ruik en proef de hemelse smaak!

Heerlijk in de soep, de pasta in een saus of tortilla.

zondag 21 oktober 2012

Roasted pumpkin slices – geroosterde pompoenschijven (GF-SF)


What a great side dish this is!!
I eat it at last once a week now the season of pumpkins has started.
Again I adapted a recipe from Plenty into a gluten free version. I love his flavours, they are so full and at the same time down to earth.

They are best eaten warm right out of the oven, but you can take them with you too as a lunch. Maybe a small salad with it and your done.

Pumpkins are a great source of iron and of vitamins A, B and C as well. They are full of  fibers and help to make  your digestion smooth, a great help for celiacs and especially the ones with a vata constitution, who tend to have difficulties in autumn.

This recipe is for Ivy, enjoy the pumpkins!

Roasted pumpkin slices (3-4 pers)

700g pumpkin, cleaned, peeled and cut in slices of 1-2 cm
50 g Parmesan, grated
20 g gluten-free breadcrumbs ( I use buckwheat, from Natine)
6 tbsp chopped flat parsley
2 ½ tsp fresh thyme leaves
zest of 1 big organic lemon
2 cloves of garlic, finely chopped
4 tbsp good olive oil
salt and pepper

Preheat the oven on 190 ˚C and prepare a baking tray with baking paper.
Lay the pumpkin slices on the tray and pour a bit of the olive oil in your hand and oil the slices around.

Make the parmesan crust ( not really a crust) by mixing the Parmesan, breadcrumbs, parsley, thyme, zest and garlic in a small bowl with a little salt and plenty of pepper.
Coat the pumpkin slices with this mixture and push on a little with your fingers.

Bake the slices about 30 minutes till they are done. By sticking the point of a knife in the pumpkin you can feel if they are right: soft is done, hard  not.

Ottolenghi serves them with some dille flavoured crème fraîche. You can do that or eat them just as they are. Both versions are great. Enjoy!


Geroosterde pompoenschijven (3-4 pers)

700 g pompoen, schoongemaakt, geschild en in 1-2 cm dikke plakken
50 g geraspte Parmezaan
20 g glutenvrij paneermeel, ik gebruik boekweit, van Natine
6 el gehakte platte peterselie
2 ½ tl verse tijmblaadjes
geraspte schil van 1 biologische citroen
2 tenen knoflook, fijngehakt
4 el goede olijfolie
zout en peper

Verwarm de oven voor op 190 ˚C en bekleed een bakplaat met bakpapier. Giet wat olijfolie in je hand en bestrijk hiermee de pompoenschijven en leg ze op de bakplaat.

Maak dan de Parmezaankorst (niet echt een korst) door in een kom de Parmezaan te mengen met het paneermeel, peterselie, tijm, citroenrasp en knoflook met een beetje zout en flink wat peper.


Bestrooi de pompoenschijven met dit mengsel en druk even aan met je vingers.
Bak de pompoen ongeveer 30 minuten in de oven tot ze gaar zijn. Steek een scherp mes in de pompoen, als het zacht voelt zijn ze gaar, hard, nog niet.

Ottolenghi serveert de plakken met zure room waar wat verse dille en peper en zout door is geroerd. Maar zo, lekker warm, uit de oven is ook super. Geniet ervan!


Related Posts Plugin for WordPress, Blogger...