Posts tonen met het label amandelmeel. Alle posts tonen

dinsdag 29 augustus 2017

Gâteaux d’amande a l’orange (GF-LF)


Is er al wat te vieren? Jazeker!
Morgen ga ik de eerste 10 boeken bestellen die bij mij zijn besteld. Ik ben er zó ontzettend blij mee.

Dat is toch waar ik het boek voor geschreven heb: behalve voor mezelf, vooral voor anderen. En weet je wat nou ook zo fijn is? Mensen zonder coeliakie blijken ook mijn blog te volgen en het boek te willen!

Het is gewoon een ontzettend mooi boek geworden met heerlijke recepten voor iedereen.


Even een zakelijke mededeling voordat ik overga tot het feestelijk recept: het boek met softcover gaat 46 euro kosten en het boek met hardcover en image wrap 54 euro (ex.verzendkosten).

Dus mocht je nog twijfelen, morgenavond 24:00uur  is de deadline voor deze order!!

En omdat ik zo blij ben, krijgt iedereen die het boek bestelt de pdf/e-book er gratis bij!! Handig voor op je laptop, telefoon of tablet, met alle mooie foto's en natuurlijk de index en alle recepten.

Een feestelijk moment vraagt om een feestelijk recept.
Deze Franse amandelcakejes zijn zuivelvrij, zelfs vetvrij.


Gâteaux d’amande a l’orange (8 stuks)
1 biologische perssinaasappel
2 biologische eieren
75 g rietsuiker
125 g amandelmeel
4 el glutenvrije maïzena
4 g gedroogde gist

8 taartvormpjes, ingevet en met rijstmeel bebloemd

Verwarm de oven voor op 160 °C.
Was de sinaasappel, snijd de helft van de schil er heel dun af (geen wit)en snijd in heel fijne reepjes/julienne. Pers de sinaasappel uit en zet apart.
Splits de eieren en doe de eidooiers in een grote kom en de eiwitten in een aparte kom en zet deze even apart.
Voeg de rietsuiker toe aan de eidooiers en mix met een handmixer tot een lichtgeel, romig geheel.
Voeg dan het amandelmeel, maïzena, gist, sinaasappelsap en      -schil toe en roer dit met een spatel voorzichtig door elkaar.
Maak dan de mixerhaken goed schoon met heet water en mix dan de eiwitten met een snufje zout tot ze stijve pieken vormen.
Schep bij het andere mengsel en met de spatel schep je de eiwitten voorzichtig door elkaar.
Schep het beslag in de geprepareerde vormpjes en zet ze op een bakplaat.
Bak de gâteaux in het midden van de oven 12-15 minuten tot ze goudbruin zijn en stevig aanvoelen als je het midden zachtjes aandrukt.
Laat ze even afkoelen voordat je de vormpjes verwijdert.
Ze zijn het lekkerst op de dag van bakken en als je wilt is een schepje crème fraîche er erg lekker bij.
Dan zijn ze natuurlijk niet meer lactosevrij ;-)


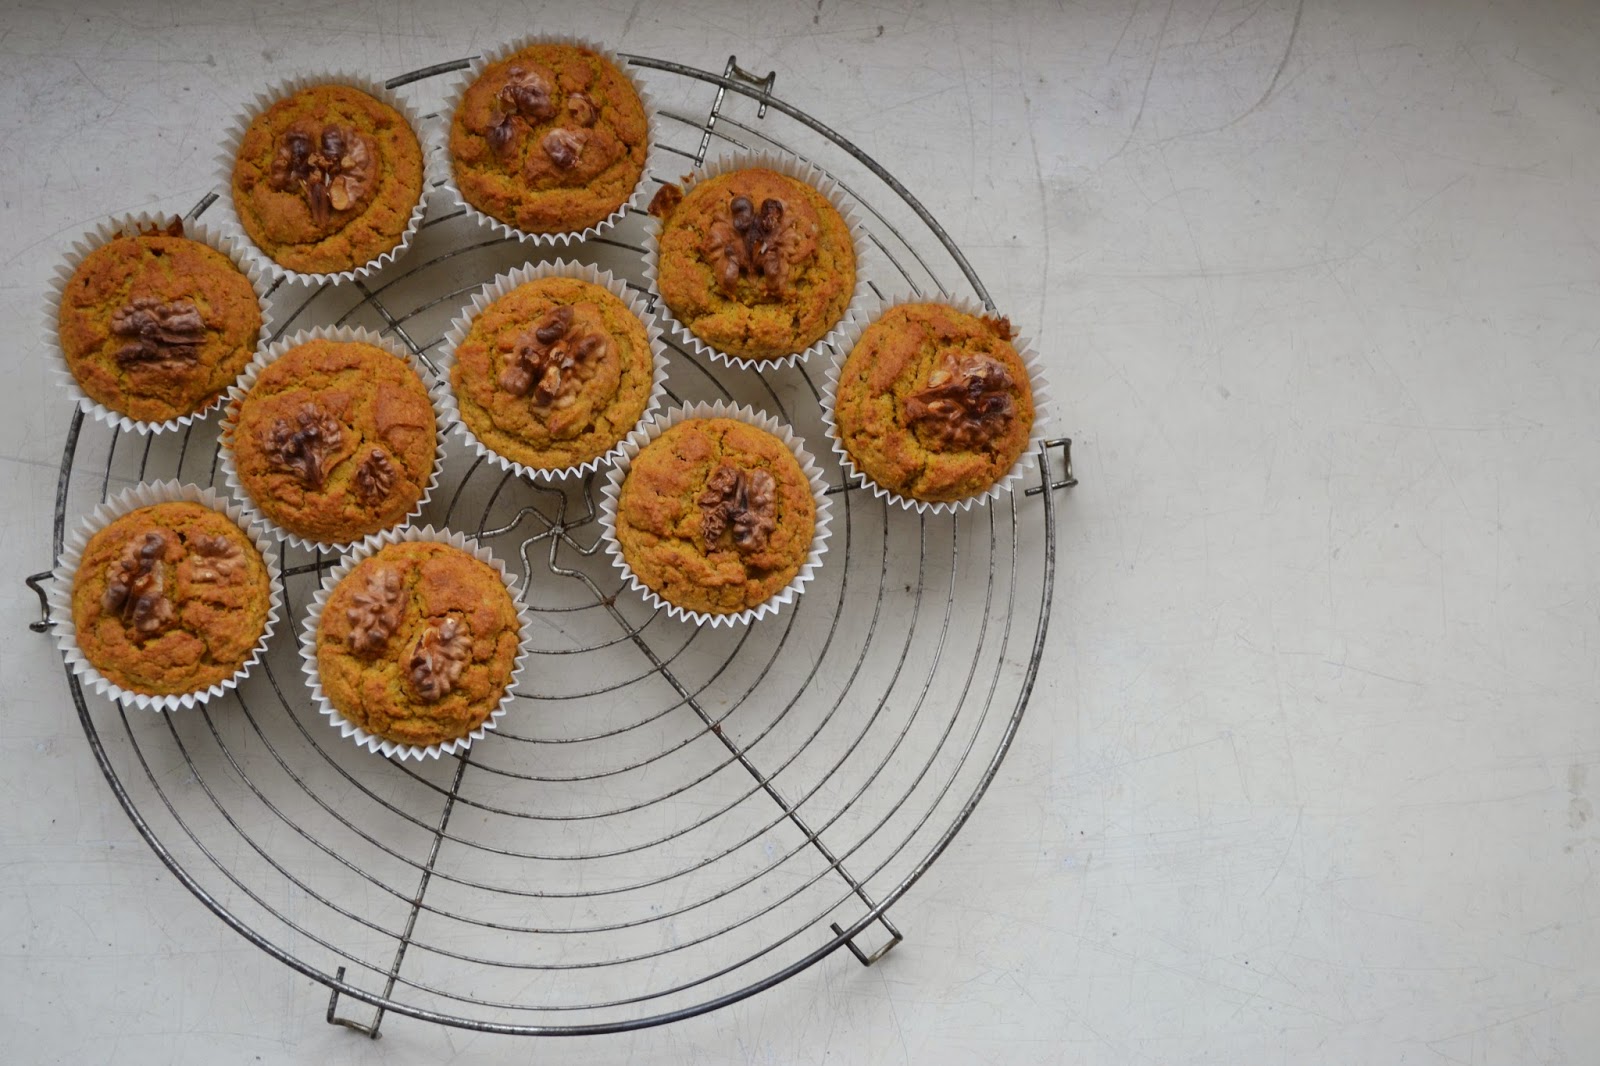
To celebrate the sale of the first 10 books I made these lovely almond cakes. They are moist ánd lactose free! Enjoy!

Gâteaux d’amande a l’orange (8 pcs)
1 organic orange
2 organic eggs
75 g of cane sugar
125 g almond flour
4 tbsp corn starch
4 g dried yeast

8 small tart moulds, buttered and floured

Pre heat the oven on 160°C/320°F.

Wash the orange, slice half of the skin very thinly (no white) and cut in very fine strips. Set aside. Juice the orange.
Separate the eggs. Put the whites in a bowl aside for a moment.
With a hand mixer mix the egg yolks and the sugar light and fluffy in some minutes. Add almond flour, corn starch, yeast, orange juice and the strips of zest. Mix gently together with a spatula.
Clean the hooks of the mixer very well, add a pinch of salt at the egg whites and mix till stiff. Add to the mixture and gently fold in the egg whites.
Scoop the dough into the prepared tart moulds and bake them in the middle of the warm oven for about 12-15 minutes minutes, till golden brown and firm to the touch.
Let them cool completely.


Very nice with some crème frâiche on the side!


woensdag 23 maart 2016

glutenvrije matzes - gluten free matzos (GF-SF-DF-V)


Ik las vorige week op de blog van de Glutenvrije Man een recept van glutenvrije matzes. 
Nu vier ik geen Pasen, want wat is dat nou helemaal verworden tot het zoveelste vreetfestijn met bergen chocolade, versgeslachte jonge geitjes en lammetjes en lunches en brunches, alsof het maar altijd gezellig moet zijn en niet op kan.

Ook heb ik niet zoveel op met de eeuwenoude wonderbaarlijke verhalen die de ronde doen over de figuur Jezus en zijn discipelen.

Een nieuwe lente, een fris begin, nieuwe creativiteit, wat in de winter heeft liggen sluimeren, dat vind ik wel iets om te vieren en ja, waarom niet met vrienden en familie met lekkere zelfgemaakte hapjes. Niks op tegen. Maar dat kan eigenlijk altijd of het liefst op zo’n eerste warme lentedag.


Deze matzes zijn ontstaan omdat ik niet alle ingrediënten die Gerry gebruikte, in huis had. Dus dank je wel Gerry voor de inspiratie!

Ze zijn gewoon super lekker, knapperig en met wat boter en jam erg lekker bij het ontbijt en als tussendoortje. Ook nog eens snel klaar en makkelijk te maken.


Je hebt nodig voor 4 matzes:
25 g amandelmeel
50 g teffmeel
40 g tapiocameel
1 el gemalen lijnzaad
2 g zeezout
62 ml handwarm water
1 el olijfolie

Verwarm de oven voor op 250°C met de bakplaat erin. Ja, heel heet!

Meng eerst de droge ingrediënten goed door elkaar, voeg water en olijfolie toe en roer door elkaar. Kneed dan snel tot het deeg vorm houdt.
Verdeel het deeg in 4 en rol per stuk uit.
Ik leg een stuk deeg op een vel bakpapier en hierop een vel huishoudfolie. Dan rol ik het zo dun mogelijk uit. Draai het deeg om, hand op huishoudfolie en pel het bakpapier eraf. Leg het deeg op een nieuw stuk bakpapier en maak zo 4 matzes. Ze passen er precies op. Prik dan met een vork zoveel mogelijk gaatjes in het deeg.
Leg het bakpapier op de hete bakplaat en bak de matzes 6-8 minuten tot de randjes lichtbruin kleuren. Haal ze eruit en leg voorzichtig op een rooster om af te koelen.
Klaar!

Vrolijke Lente ;-)


You’ll need for 4 matzos:
25 g almond flour
50 g teff flour
40 g tapioca flour
1 tbsp flax seeds, roughly pulsed
2 g sea salt
¼ cup or 62 ml hand warm water
1 tbsp olive oil

Pre heat the oven on 250°C or 482 °F with the baking tray inside!

Mix the dry ingredients well, then add water and oil. Mix with a spoon and then knead by hand quickly till the dough comes together.
Divide in 4.
Put 1 piece of dough on a sheet of baking paper and roll out with a piece of cling film on top. Very thinly, then transfer to a clean piece of baking paper, by putting your hand on the dough and cling film and turning it upside down. Peel off the baking paper. Repeat with the other 3 pieces of dough. Prick the matzes evenly with a fork and transfer to the baking tray in the hot oven.

Bake for 6-8 minutes till the edges brown slightly.
Let them cool on a rack; till they are crisp and delicious.


Happy spring time!


dinsdag 23 december 2014

Glutenvrije kaneel-gember kerststol – gluten free almond-ginger Christmas stollen (GF-DF-V)


Op de valreep maakte ik deze heerlijke kerststol. Dus als je nog even tijd hebt, zeg een middagje, dan maak je gewoon nog even een kerststol voor jezelf of een coeliake geliefde of familielid. Het is een echt brood, met een echte korst, dus geen zacht brood, niet voor softies!


Je hebt nodig:
200g amandelspijs en voeg dan ½ theelepel kaneel door de gemalen amandelen

3g instant gist
5g suiker
120 ml handwarm water
Scheutje appelazijn
1 el olijfolie

½ tl zeezout
1 el gemalen lijnzaad
1 el psylliumzaad

En voor de vulling:
75g gemengde zuidvruchten; cranberries, krenten, rozijnen
50g gemengde noten, licht geroosterd en fijngehakt
25g gekonfijte gember, fijngehakt

1. maak eerst het amandelspijs en meng er ½ tl kaneel door. Ik heb deze keer geen ei toegevoegd, de amandelspijs is erg smeuïg van zichzelf.


2. dan maken we het deeg:
In een kommetje schenk je handwarm water op gist en suiker, roer even door en laat 10-15 minuten ontwikkelen. Het mengsel gaat schuimen.
Doe de boekweitmix in een kom en meng goed met zout, lijnzaad en psyllium.

3. Prepareer de vulling: rooster en hak de noten en doe ze met de zuidvruchten en gekonfijte gember in een kom, zet even apart.

4. Als het gistmengsel schuimt giet je er de olijfolie en de appelazijn bij en dan direct bij het meelmengsel. Roer goed door elkaar, het moet een vrij plakkerig deeg blijven, niet te droog dus!
Roer het vruchten-notenmengsel erdoor en dek af met wat huishoudfolie en laat minimaal een uur rusten/rijzen op een warme plek.


5. Vervolgens leg je het deeg op een vel bakpapier en druk met je handen tot een plak van ongeveer 23 x 18 cm, hoeft niet netjes een beetje rustiek is helemaal goed ;-) Verdeel het amandelspijs in een rolletje over de lengte van het deeg en vouw het deeg eroverheen. Druk licht aan met je vingers en leg het deeg met bakpapier op een bakblik. Laat zeker nog een uur rusten/rijzen bedekt met huishoudfolie op een warme plek.

6. Verwarm dan de oven voor op 180°C en bak de stol in het midden van de oven 35-40 minuten tot het goudbruin en gaar is.
Ik gebruik deze keer geen ei, dus blijft deze stol veganistisch.

Fijne kerstdagen!


This gluten free and vegan Christmas stollen is a real bread, with a good crust, not for softies!

You’ll need:

200g almond paste, store bought or make your own: I added ½ tsp cinnamon and left out the egg this time, since the paste was gooey enough!

3 g instant yeast
5g sugar
120 ml hand warm water
Dash of apple cider vinegar
1 tbsp olive oil

½ tsp sea salt
1 tbsp ground flax seed
1 tbsp psyllium husks

For the filling:
75g mixed dried fruits, like cranberries, sultanas, currants
50g mixed nuts, lightly toasted and chopped
25g candied ginger, chopped fine

1. first make the cinnamon almond paste and set aside.

2. make the yeast slurry by mixing the hand warm water with the yeast and sugar. Give it a stir and leave it on a warm spot to develop, 10-15 minutes. It will become foamy.

3. mix the flour mix with salt, flax and psyllium in a bowl. Set aside.

4. make the filling by toasting and chopping the nuts and mixing with the other ingredients.


5. when the yeast mix is ready, pour in a dash of apple cider vinegar and the olive oil and pour everything into the flour mixture. Stir till it forms a sticky dough. Add chopped nuts and fruit and fold them in. It must be sticky, so when the dough is too dry add some warm water!
Put a piece of cling film over the bowl and let the dough rest/rise on a warm spot for at least 1 hour.

6. put the dough on a piece of baking paper and flatten it out into a rectangle of 23 x 18 cm, not too neat ;-) a bit rustic is ok. Divide the almond paste in a roll lengthwise on the dough and fold over the dough. Press the sides lightly.
Put the bread with the paper on a baking tray, cover again with cling film and let it rest/rise for a second time on a warm spot for another hour.

7. pre heat the oven on 180°C and bake the stolen for 35-40 minutes in the middle of the oven till golden-brown. I did not use any egg wash on top to keep it vegan, you can if you want to get a glossy finish. Let it cool completely before cutting.


Happy Christmas days!

donderdag 27 november 2014

Gluten-free buckwheat boule – glutenvrije boekweitbol (GF-DF-V)


As promised I share with you my newly developed buckwheat boule.
It’s kind of funny that I started creating bread again. For many years I just gave up on bread baking and eating it as well. Buying gluten-free bread I gave up really quickly, because it’s inedible, I think. Most of it then. It’s expensive, tastes like cardboard and after a day you can throw it away; filled with starches and gums and other ingredients that has nothing to do with bread.

I did make flat breads a lot, quick and easy, as well as the seed bread that I ate for almost a year now. But suddenly I was craving for a real slice of bread and started my survey.

Bread is flour, water, salt and a rising agent. But, gluten-free bread baking is more than that, the rising is a problem, so can be the taste. There is only 1 advantage when baking gluten-free bread and that is that it doesn’t need any kneading! Just stir everything vigorously and you’re done!

I am going to give you my first new bread recipe of a very good tasting buckwheat boule with a crunchy crust. 
Be aware though that every type of flour, oven, surrounding temperature has influence on your bread, so maybe the first time you bake this bread it’s not perfect yet or it looks different then mine.
Just keep on going and let me know of the results or question me if there are any problems!

You’ll need:
2 cups or 290g of buckwheat flour mix
5g quick yeast
4g of sea salt
5g of cane sugar
2 tbsp of ground flax seeds
2 tbsp of psyllium husks
1 ¼ cup of hand-warm water
2 tbsp of olive oil


Mix the dry ingredients in a big bowl.
Mix water and olive oil in a small bowl and pour straight into the dry ingredients. Mix with a sturdy spoon into a batter-like-dough. It will be a little wet, that’s ok.

I leave the bread overnight with a humid cloth on top on room temperature and bake the bread first thing in the morning.

Pre-heat your oven on 200°C together with the baking tray and a small bowl of water. (to create a slightly moist atmosphere)

Take out the dough carefully and put it on your work bench which is sprinkled with a little flour on a piece of baking paper. Form the dough, do not handle too much!! into a nice boule shape and score the dough with a sharp knife. This is important because the rising of the bread in the hot oven will otherwise crack the bread’s crust.

Put the bread in the oven and after closing the door, immediately put the temperature on 180°C and bake the bread for 1 hour on this temperature. Then after 1 hour lower the temperature to 150°C and bake for another hour. Check the bread with a thermometer. The inside must be between 95° and 100°C. The crust is really crunchy!

Let it cool completely before cutting a slice!

The bread stays well for about 3 days, which I think is very important, so you don’t have to freeze it. It’s a dense bread, not light and fluffy, a real bread so to speak! And gluten-free!

I had some of my friends, wheatbread eaters, have a taste and they were all pleasantly surprised by the taste and structure.
I really hope you like it too!


Je hebt nodig:
5 g instant gist
4 g zeezout
5 g rietsuiker
2 el versgemalen lijnzaad
2 el psyllium husks
310 ml handwarm water
2 el olijfolie

Meng alle droge ingrediënten in een ruime kom.
Meng water en olijfolie en giet in 1 keer bij de droge ingrediënten en roer met een stevige pollepel alles zeer goed door elkaar. Je ziet het mengsel samenkomen tot een op-beslag-lijkend-deeg. Dus wel wat nat, maar net een deeg.

Laat het brood in de kom met een vochtige doek erover een nacht rusten op kamertemperatuur en bak het brood zodra je wakker wordt.

Verwarm de oven voor op 200°C samen met het bakblik en een kommetje water onder in de oven.

Strooi wat meel op een stuk bakpapier en met bebloemde handen neem je voorzichtig het deeg uit de kom en leg het op je werkblad. Vorm in een mooie boule vorm, maar behandel het deeg als een baby, niet knijpen en kneden! 
Kerf het brood in met een scherp mes, zodat het brood niet op onverwachte plek gaat scheuren tijdens het bakken.
Leg het brood in de voorverwarmde oven en sluit de deur. Zet de temperatuur meteen op 180°C en bak 1 uur op deze temperatuur. Zet dan de temperatuur op 150°C en bak nog 1 uur.

De binnentemperatuur van het brood moet nu tussen 95° en 100°C zijn en de korst heel knapperig. Je kunt ook op de bodem kloppen, dit moet hol klinken. Laat het brood helemaal afkoelen voordat je het aansnijdt!


Het brood blijft zeker 3 dagen goed en eetbaar, zodat je het niet hoeft in te vriezen; ik bewaar het in een afgesloten schaal. Het is een stevig, compact brood met een heel goede smaak, niet luchtig maar smeerbaar, makkelijk mee te nemen, heel lekker om even te toasten voor je het eet.

Echt brood en toch glutenvrij!!

Ik heb het brood laten proeven door mensen die gluten eten en zij vonden het allemaal erg lekker en ik hoop jij ook!


maandag 17 november 2014

Gluten-free all-purpose buckwheat flourmix – Glutenvrije boekweitmeelmix


Last week I talked about and used a gluten-free flour mix that I developed lately.
Making a big pot of gluten-free flour mix is a very quick and clever thing to do. Having a ready-to-grab mixture enables you to make your gluten-free baking easier.

A good gluten-free flour mixture includes different ingredients in order to get the best results.
There are different types of gluten-free flours:
* whole “grain” flours, like brown rice flour, buckwheat flour, oat flour, teff flour, quinoa flour, millet flour, sorghum flour, etc.
* “white” flours or starches, like arrowroot, corn starch, tapioca flour, potato starch, white rice flour, etc.
* nut flours, like almond flour, hazelnut flour, coconut flour, chestnut flour
* bean flours, like garbanzo bean flour, fava bean flour and soybean flour

Then, as an addition to make for example bread chewy and bind the ingredients together, I add psyllium husks, chia seeds and/or ground flax seeds. In my beginner’s years of gluten-free baking I used xanthan gum for binding, but I came to the conclusion that it gives me digestive problems like bloating, gas, intestinal cramps and so on, so I don’t use it anymore.

Some baking can be done with just a single flour, think of buckwheat crackers, socca, brownies, cookies, but baking a bread with a single flour mostly turns out hard, dry and not tasty at all. That’s why I make a combination of whole grain, starches, nut flours and 1 of the additions.

So in order to prevent your baking from falling apart and give it some structure as well of taste, which is so different because of the missing link: gluten, the best idea for making a tasty bread or all purpose flour mixture is to make a mix of ingredients.

All flours and starches have different properties, flavours and baking qualities, so in order to make a mix that suits your taste or purpose you can choose to make different mixes. It is also nice to experiment with the flavours.


I want to start and share with you my basic buckwheat all-purpose flour, because I love buckwheat for its taste, it’s easy to digest and it’s considered a complete protein: it contains all 8 essential amino acids, it’s high in fiber, calcium, phosphorus and magnesium. It’s a whole “grain”, so eating it will make you feel satisfied and full.
Brown rice flour I use because it’s versatile, whole grain and not too expensive, a great source of fiber, selenium and magnesium.
Tapioca flour: made from the dried cassave root. It doesn’t contain much nutrition, a little iron and some trace minerals like calcium and copper, no fiber, but it has binding properties, which we need in gluten-free baking and it makes a good crust and a lighter texture. And the price is right too!
Almond flour:  I love the taste and texture of blanched almond flour, it gives baked goods a rich texture and taste as well as moistness. It is high in protein, Vitamin E, magnesium and it’s a low-glycemic food (releases its glucose slowly).

Okay, now grab a big pot and start mixing; I suggest you use a scale because cups can vary much in weight. I give you 3 measurements, 1 to first make a small batch, then double and triple to make a bigger batch.

All-purpose buckwheat flour mix

75-150-225 g brown rice flour
75-150-225 g buckwheat flour
95-190-285 g tapioca flour
45-90-135 g blanched almond flour
Put everything in a pot, close the lid and shake well. That’s it. Now you can make the muffins from last week or these easy-peasy flat breads. Next time I will post a beautiful buckwheat boule recipe with this flour mix!


Basis boekweit meelmix

75-150-225 g bruine rijstmeel
75-150-225 g boekweitmeel
95-190-285 g tapiocameel
45-90-135 g amandelmeel


Doe alles in een grote pot, deksel erop en schudden maar. Klaar voor gebruik! Je kunt nu de pompoenmuffins van vorige week maken of deze makkelijke platte broodjes. Volgende week het recept voor een prachtige boekweitbol!

dinsdag 11 november 2014

Gluten-free pumpkin spice muffins – glutenvrij pompoenmuffins (GF-DF)


Baking warm bread, muffins, speculaas. It's the time of year and how good is it with a warm oven in the kitchen and lovely smells pouring out of it every day. The only problem is that I cannot eat all of it, so I have to restrict myself a bit. 

I bought myself a slow-cooker and am experimenting with it too now. almost every day. I must say that I like the way things cook so far. I made a pumpkin butter from Tasty Yummies, really delightful! I made a creamy brown basmati breakfast porridge, which I will  share shortly and I even baked a gluten-free buckwheat bread in it! 

Making a good and tasty, crusty gluten-free bread is one of my goals this winter. I bought this book and I am really inspired by it. But as you know I cannot follow a recipe to the dot, so I am struggling to make my own variations and I will keep you informed!


Instead of the all-time favourite banana bread I like to bake in autumn, I made these warm flavoured pumpkin spice muffins. They are lightly sweet and rich from the spices and pumpkin puree.


You’ll need:
dry ingredients:
1 cup GF flour mix (next post more about it)
¼ cup almond flour
1 tsp baking powder
¼ tsp sea salt
1 heaped tsp pumpkin spices
1/3 cup of unrefined cane sugar

wet ingredients:
½ cup pumpkin puree
1 organic egg
¼ cup olive oil
1 tbsp vanilla extract
lemon zest
¼ cup + 2 tbsp rice milk or nut milk

Pre heat the oven on 350 °F or 175°C.

Mix the dry ingredients in a big bowl.
Mix the wet ingredients in a small bowl.
Pour wet into dry and mix quickly and well.
Divide over 6 mini loaf pans, or 10 paper muffin liners and bake in the middle of the oven for 40-45 minutes till done. Prick a bamboo skewer inside and when it comes out clean, they are done.
Let them cool a little if you can resist the smell!


Je hebt nodig:
droge ingrediënten:
145 g glutenvrije meelmix (meer hierover in de volgende post)
30 g amandelmeel
1 tl bakpoeder
¼ tl zeezout
1 volle tl speculaaskruiden
50 g ongeraffineerde rietsuiker

natte ingrediënten:
½ cup/125 ml pompoenpuree
1 biologisch ei
¼ cup/60 ml olijfolie
1 el vanille extract
citroenrasp
¼ cup/60 ml + 2 el rijstmelk of notenmelk

Verwarm de oven voor op 175°C.

Meng de droge ingrediënten in een grote kom.
Meng de natte ingrediënten in een kleine kom.
Giet nat in droog en roer snel en goed door elkaar.

Verdeel over 6 mini broodvormpjes of 10 muffin vormpjes en bak in het midden van de oven 40-45 minuten, totdat ze gaar zijn. Prik met een bamboeprikker in het midden en als deze er schoon uitkomt is je pompoen muffin klaar. Laat even afkoelen als je het kunt laten!


zondag 28 september 2014

Gluten free Dutch apple pie – glutenvrije Hollandse appeltaart


Deze taart draag ik op aan Jeanine, met heel veel dank voor je enthousiaste lessen! I dedicate this pie to Jeanine! For that I write my blog in Dutch, the English recipe is on the bottom.


Goh, volgens mij heb ik, sinds er coeliakie bij mij is vastgesteld in 2007 alweer 7 jaar geleden, nog nooit een appeltaart gebakken. Vreemd eigenlijk, want hoe lekker is appeltaart. Vooral als je de taart bakt voor een vergadering, namelijk met mezelf!

Ik ben op energieweek geweest 2 weken geleden in Villamartin in Andalucië. Met een geweldige groep van 7 andere mooie vrouwen en TCM-therapeute Jeanine Hofs heb ik een week mezelf verdiept in de werkingen van energie, mijn energie, die van anderen, hoe mijn energie te vergroten, te beschermen, te gebruiken en niet zomaar voor lief te nemen. Voor meer informatie kijk op de site van Jeanine, het levende voorbeeld van hoe zo goed mogelijk voor jezelf te zorgen en in de praktijk toepassen van allerhande eeuwen oude technieken betreffende energie, waaruit we allen bestaan.

1 van haar technieken is dus de vergadering met jezelf. Wekelijks een bijeenkomst met jezelf om te kijken hoe het met je gaat op lichamelijk, spiritueel, werk, liefdes etc. niveau. Verzorgd met een pot thee en iets lekkers, zoals een stuk van deze heerlijke appeltaart:

Je hebt nodig:
100g bruine rijstmeel
60g boekweitmeel
60g amandelmeel
1 tl bakpoeder
50g rietsuiker
½ tl zeezout
Rasp van 1 biologische citroen
120 g koude boter
1 eidooier
1 el vanille extract
500g goudreinetten
4 el rietsuiker
1 el kaneel
100g rozijnen, geweld zo nodig

20cm springvorm, beboterd of bekleed met bakpapier

Eerst mengen we de eerste 7 ingredienten in een grote kom. Voeg de koude boter toe en snijd met 2 messen in piepkleine stukjes. Verkruimel en meng dan met je vingers tot een zanderig geheel. Voeg dan de eidooier en vanilleextract toe en kneed snel tot een samenhangend deeg.

Bekleed de springvorm met ¾ van het deeg met een rand van ongeveer 3 cm. Zet 1 uur in de koelkast, zo ook  het overgebleven stuk deeg.

Na 1 uur verwarm je de oven voor op 175°C.

Schil de appels en, afhankelijk van de grootte van de appel, snijd ze in 4-en of 8-en en in dunne schijfjes. Meng met kaneel, suiker en rozijnen en schep in de vorm. Van het overgebleven stukje deeg maak je reepjes als decoratie bovenop.

Bak de appeltaart ongeveer 50 minuten in het midden van de oven tot het deeg goudbruin is en de appels zachtgaar, maar nog heel. Kijk na 40 minuten of de bovenkant niet te hard gaat. Als dat het geval is leg je er los een vel aluminiumfolie op.

Laat de taart helemaal afkoelen voor je de springvorm losmaakt. Snijd de delicate en enigszins kruimelige taart voorzichtig en geniet van deze heerlijk glutenvrije appeltaart met je geliefden of met jezelf op de vergadering!


you'll need:

100g brown rice flour
60g buckwheat flour
60g almond flour
50g cane sugar
1 tsp tartaric acid baking powder
½ tsp sea salt
Zest of 1 organic lemon
120g cold butter
1 egg yolk
1 tbsp vanilla extract
500g pie apples like bramble
4 tbsp cane sugar
1 tbsp cinnamon
100g sultanas, soaked or not
20cm/8 inch springform cake tin, buttered or prepared with baking paper

First we mix the first 7 ingredients in a big bowl.
Add the cold butter and cut into very tiny pieces with 2 knives. Rub everything together with 1 hand into a sandy dough. Then add egg yolk and vanilla extract and knead quickly into a dough.

Press ¾ of the dough into the cake tin, on the bottom and about 3 cm up the sides. Let it rest into the fridge for 1 hour, with the remaining ¼ of the dough.

After 1 hour pre heat the oven on 175°C/ 350°F.

Peel the apples, cut them in quarts or eights, depending on the size of the apples and slice into 5mm parts. Mix with the cinnamon, sultanas and sugar and scoop into the prepared tin.

From the left-over dough you can make thin strips to decorate the top.

Bake in middle of the oven for about 50 minutes, till the dough is golden brown and the apples soft but not mushy. Check after 40 minutes if the top is not browning too quickly. If so put a piece of aluminium foil loosely on top.
Let it cool completely before removing the ring and cut the delicate and a bit crumbly tart with care. Enjoy this really Dutch treat!


Related Posts Plugin for WordPress, Blogger...